Reddos 1960 Supalite Atlas Resto
-
Strugglebrook
- Posts: 343
- Joined: Tue Jul 15, 2014 9:53 am
Re: Reddos 1960 Supalite Atlas Resto
Looking better and better and more and more finished every day. 
Re: Reddos 1960 Supalite Atlas Resto
Looking good there Mate.
Have been following closely but not posting because it won't let me login every time I try to post.
Hopefully its sorted this time.
Have been following closely but not posting because it won't let me login every time I try to post.
Hopefully its sorted this time.
Re: Reddos 1960 Supalite Atlas Resto
Hi Iluvans.
Yup...re: Login probs.... i am hearing you
I had the same issues a while back..
Just when ya think its all plain sailing the login problems come back to haunt you.
When i finally got it sorted i clicked on "remember user and password "
Now every time i go to post something, i dont get asked to duplicate passwords and type in upper and lower case and numbers etc..
What a pain the bum that was.
 If all else fails get in contact with Richard and get him to help sort it out.
Cheers
Reddo
Yup...re: Login probs.... i am hearing you
I had the same issues a while back..
Just when ya think its all plain sailing the login problems come back to haunt you.
When i finally got it sorted i clicked on "remember user and password "
Now every time i go to post something, i dont get asked to duplicate passwords and type in upper and lower case and numbers etc..
What a pain the bum that was.
Cheers
Reddo
Re: Reddos 1960 Supalite Atlas Resto
Howdy..
Here is where i was at yesterday arvo..
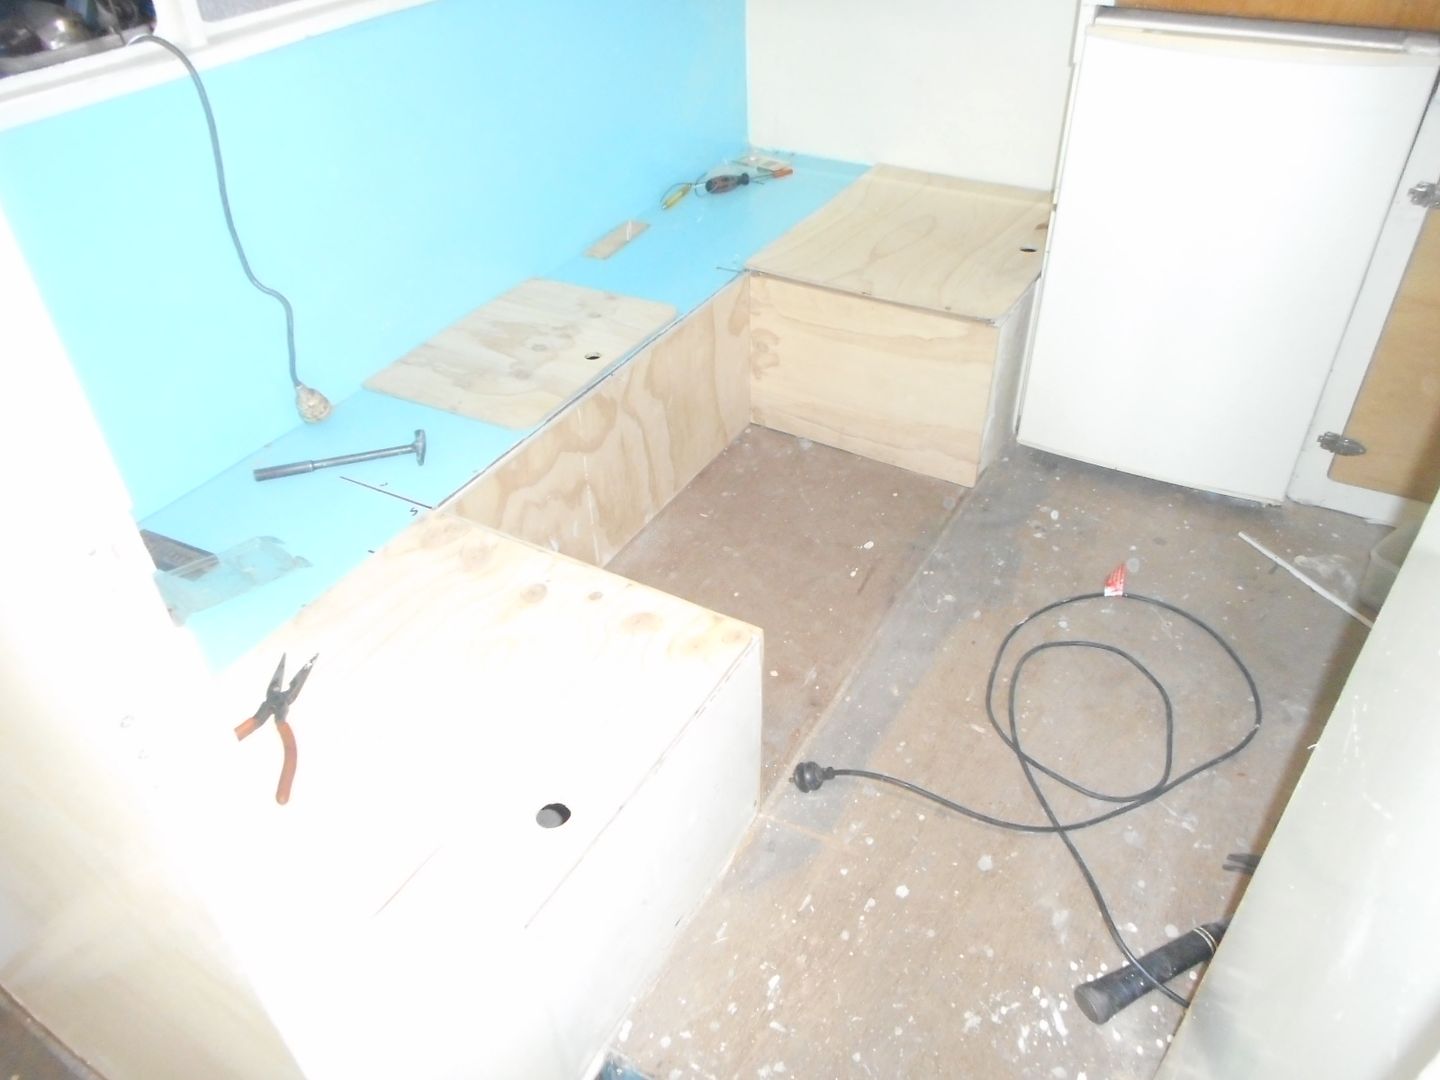
Vacumed up the mess and packed away a few tools.. then give everything a coat of "4 in 1" sealer /undercoat / primer... umm i dont know what the 4th one is??
Picked up my 4 metre hose for the stove this morning from the local gas supplier $45 with 2 X 1/4 female fittings fitted..
Came home
Finished mounting the stove in place and ran Gas hose , 12 V and 240V wiring through to the storage area under the front seats.
The undercoat had dried on the framework and storage compartment lids by then... so i managed to get a final coat on everything up front.. nice warm sunshine had everything dry by pack up time today...
So sat em all back in place.. just gotta fit the hinges in the morning .

Then i can finish off the table .. Mount the Marconi track on the front wall and fit the table.
Gunna run a bit of architrave Merranti across the leading edge of the seats .. let it stick up enough to stop the cushions sliding off the bases.
Not too sure what or where i will get the seat cushions from.. Will have to start scanning the curbside junk piles for old 3 seater lounges with nice cushions.. dunno..  worry about that later.
The back end/ bed area isnt being modified so its just a matter of running wires.. sanding back and painting whats already there...easy peasy...
Did i say no modifications ??
The battery box will be in the left side compartment. I want it set up in there as i intend mounting a 35 litre Engel 2 way fridge in the bottom of the wardrobe .. close handy to the battery..
will sort out underfloor ventilation and sneak an external vent in the outside wall which will be hidden behind the entry door when its open.
Will also have 240 V outlet in there so i can swap over when on a powered site...Also be able to access it when i cut the service door in behind the wheel arch like Öld Blue "had in it.. They came standard like that in 56 .. i dont know why the dropped the idea later in production..
Getting a bit ahead of myself here.. havent given the wiring / lighting too much thought yet ???
Working tomorrow .. so.. a national day of rest has been declared.
Reddo
Here is where i was at yesterday arvo..

Vacumed up the mess and packed away a few tools.. then give everything a coat of "4 in 1" sealer /undercoat / primer... umm
Picked up my 4 metre hose for the stove this morning from the local gas supplier $45 with 2 X 1/4 female fittings fitted..
Came home
Finished mounting the stove in place and ran Gas hose , 12 V and 240V wiring through to the storage area under the front seats.
The undercoat had dried on the framework and storage compartment lids by then...
So sat em all back in place.. just gotta fit the hinges in the morning .

Then i can finish off the table .. Mount the Marconi track on the front wall and fit the table.
Gunna run a bit of architrave Merranti across the leading edge of the seats .. let it stick up enough to stop the cushions sliding off the bases.
Not too sure what or where i will get the seat cushions from..
The back end/ bed area isnt being modified so its just a matter of running wires.. sanding back and painting whats already there...easy peasy...

Did i say no modifications ??
The battery box will be in the left side compartment. I want it set up in there as i intend mounting a 35 litre Engel 2 way fridge in the bottom of the wardrobe .. close handy to the battery..
will sort out underfloor ventilation and sneak an external vent in the outside wall which will be hidden behind the entry door when its open.
Will also have 240 V outlet in there so i can swap over when on a powered site...Also be able to access it when i cut the service door in behind the wheel arch like Öld Blue "had in it.. They came standard like that in 56 .. i dont know why the dropped the idea later in production..
Getting a bit ahead of myself here.. havent given the wiring / lighting too much thought yet ???
Working tomorrow .. so.. a national day of rest has been declared.
Reddo
-
Strugglebrook
- Posts: 343
- Joined: Tue Jul 15, 2014 9:53 am
Re: Reddos 1960 Supalite Atlas Resto
Looking real good Mate, cant wait to see in the ply.
Re: Reddos 1960 Supalite Atlas Resto
Hi SB
As you can well imagine i would have loved to have it finished for Murrurundi as requested..and i am making every effort to achieve that
but unfortunately there is a smidtt load of stuff still to be done , and i dont want to rush it.
My prediction for a Shellharbour V V gathering debut is much looking more realistic.
Reddo
Re: Reddos 1960 Supalite Atlas Resto
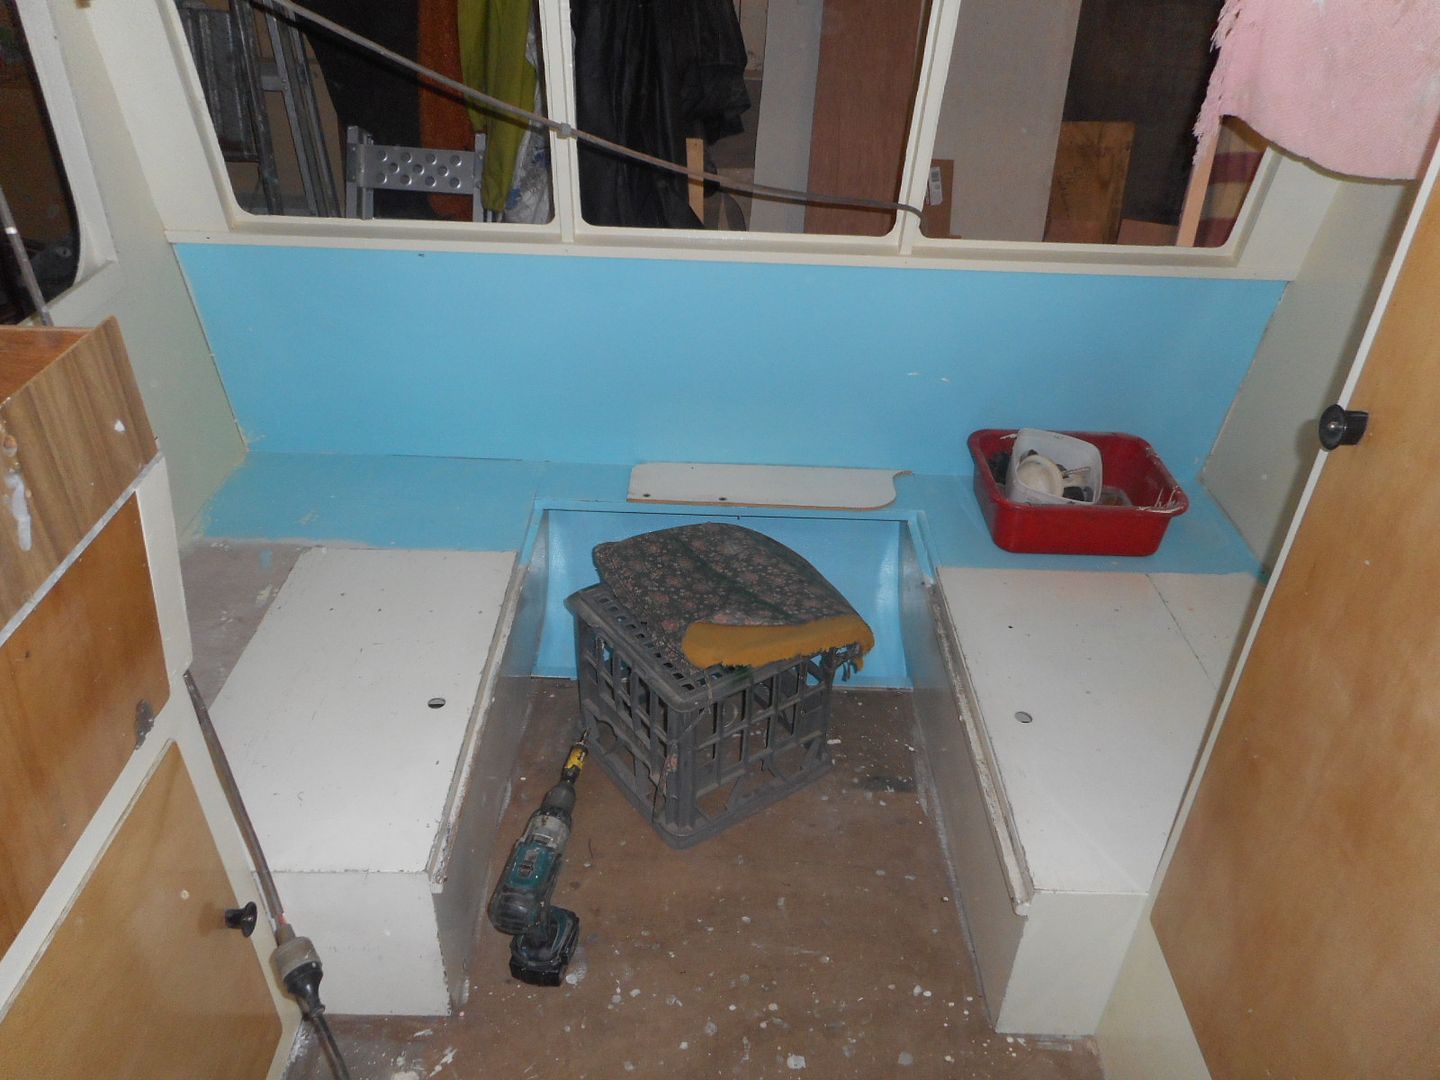
A bit more progress..
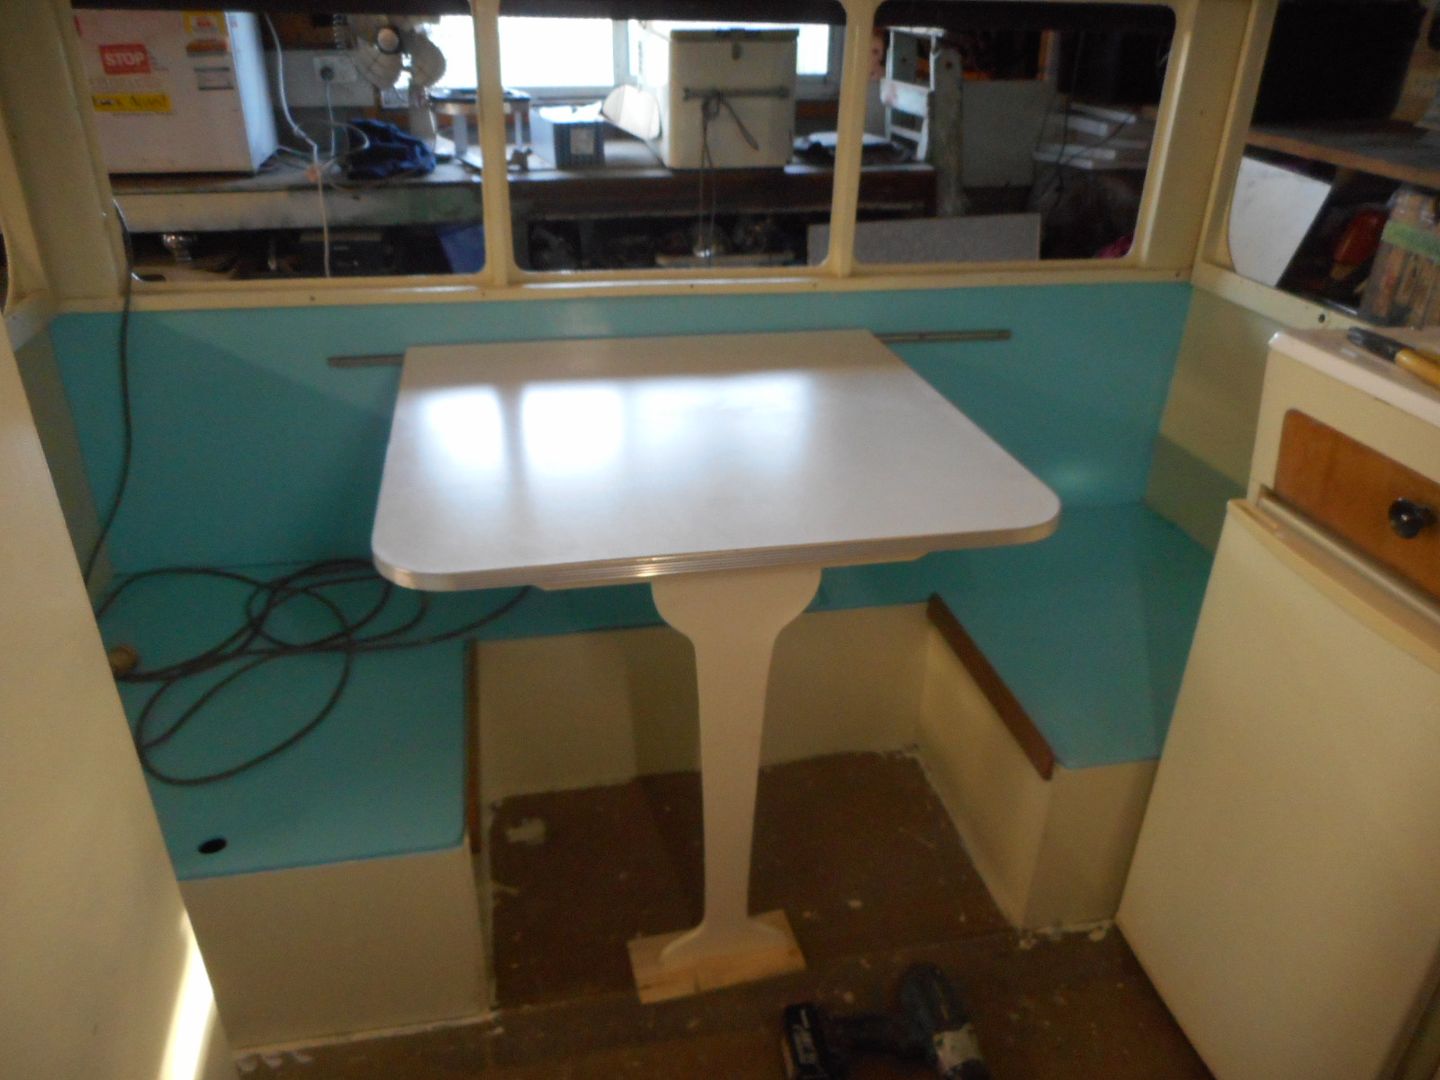
Managed to finish off the table.. fit the marconi rail.
Fit the "Anti cushion fall off timbers"...
I know im not suppose to do the floor covering until last ... but .. it was time i had a good look at the options.
When i bought the van Aquamum threw in about 50 old lino tiles.. Just enough to cover the floor... Greens, yellow, grets, Blues , reds.. I could have had a ball sticking them down...
But as i stated earlier in these posts each tile weighed about 500 grams.. which would have added up to 25 KG on the floor.. the consider that the floor doesnt stay flat when ya walk on 12mm ply unless its really stiffened up under the van.. which it isnt.
So.. would also have issues with the tiles wanting to peel up
So... i dragged down some Formica lamitex flooring i bought at a garage sale for $3,, about 6 years ago..
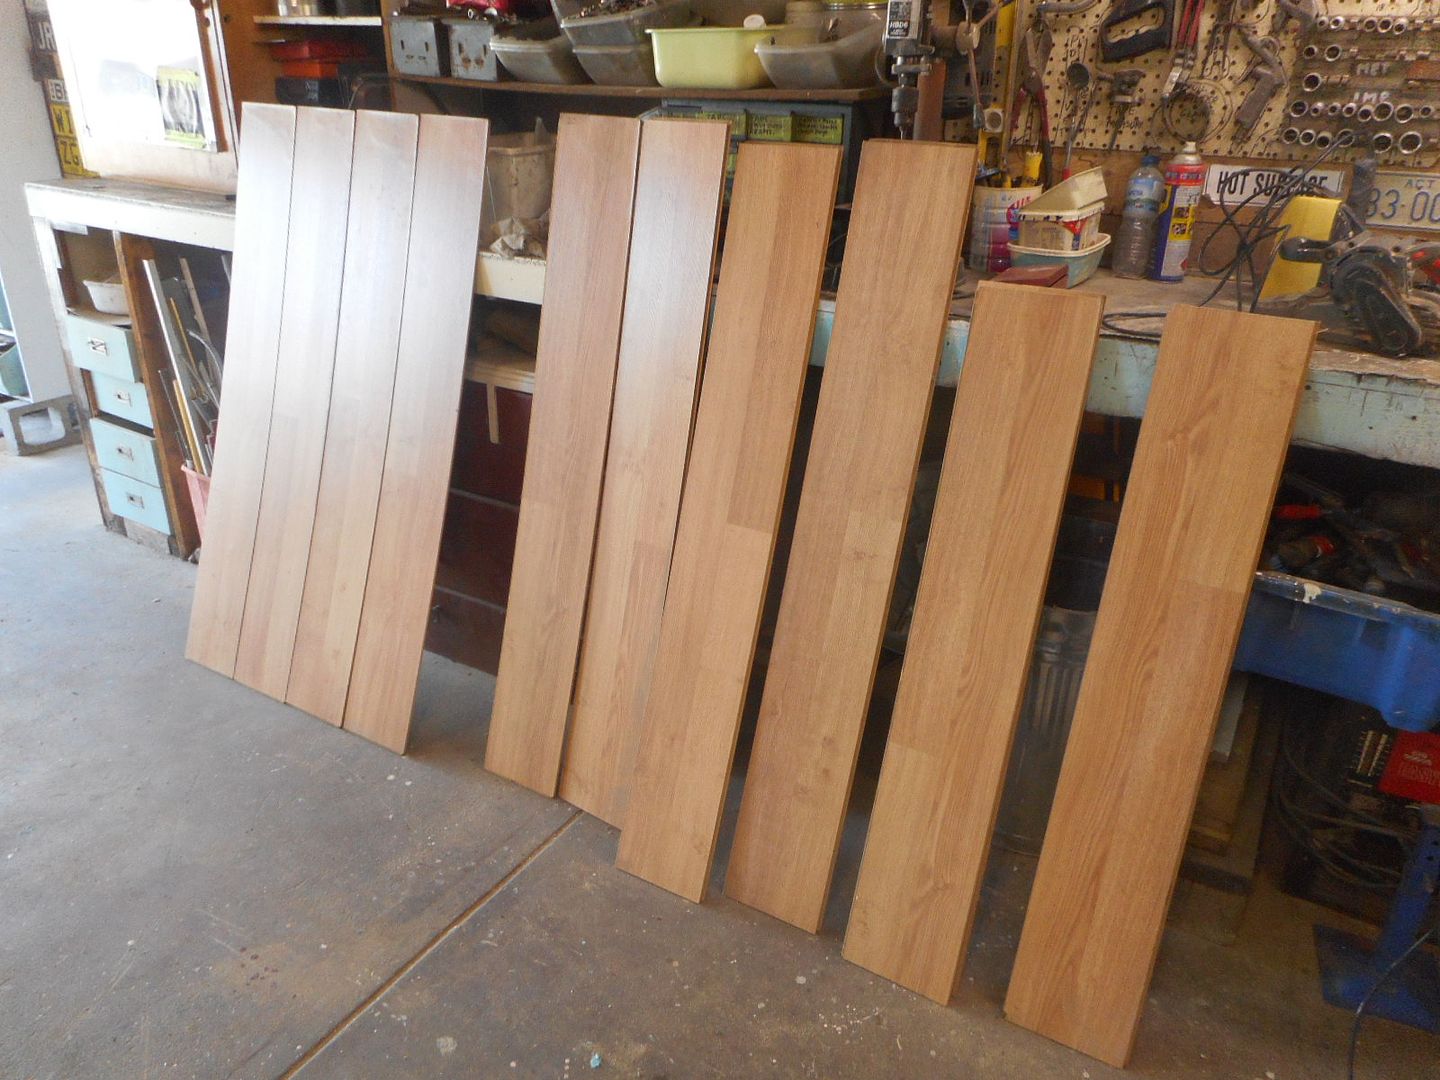
A few quick measurements and calcs revealed there was just enough boards to fill the floor in the Supalite... .. So.. off i went .. took about 2 hours. and some of the edges had become a bit "furry "and needed cleaning up so they would fit into the board next to them..
In the end i had to use pin nails through the face of the board to make sure they stayed put.. 99% was "Hidden nailed "and it looks good..
The boards almost got used on the "Not Everyones Cuppa Tea TD" project about 3 years ago... but ...i shelved that idea... thank god i did .
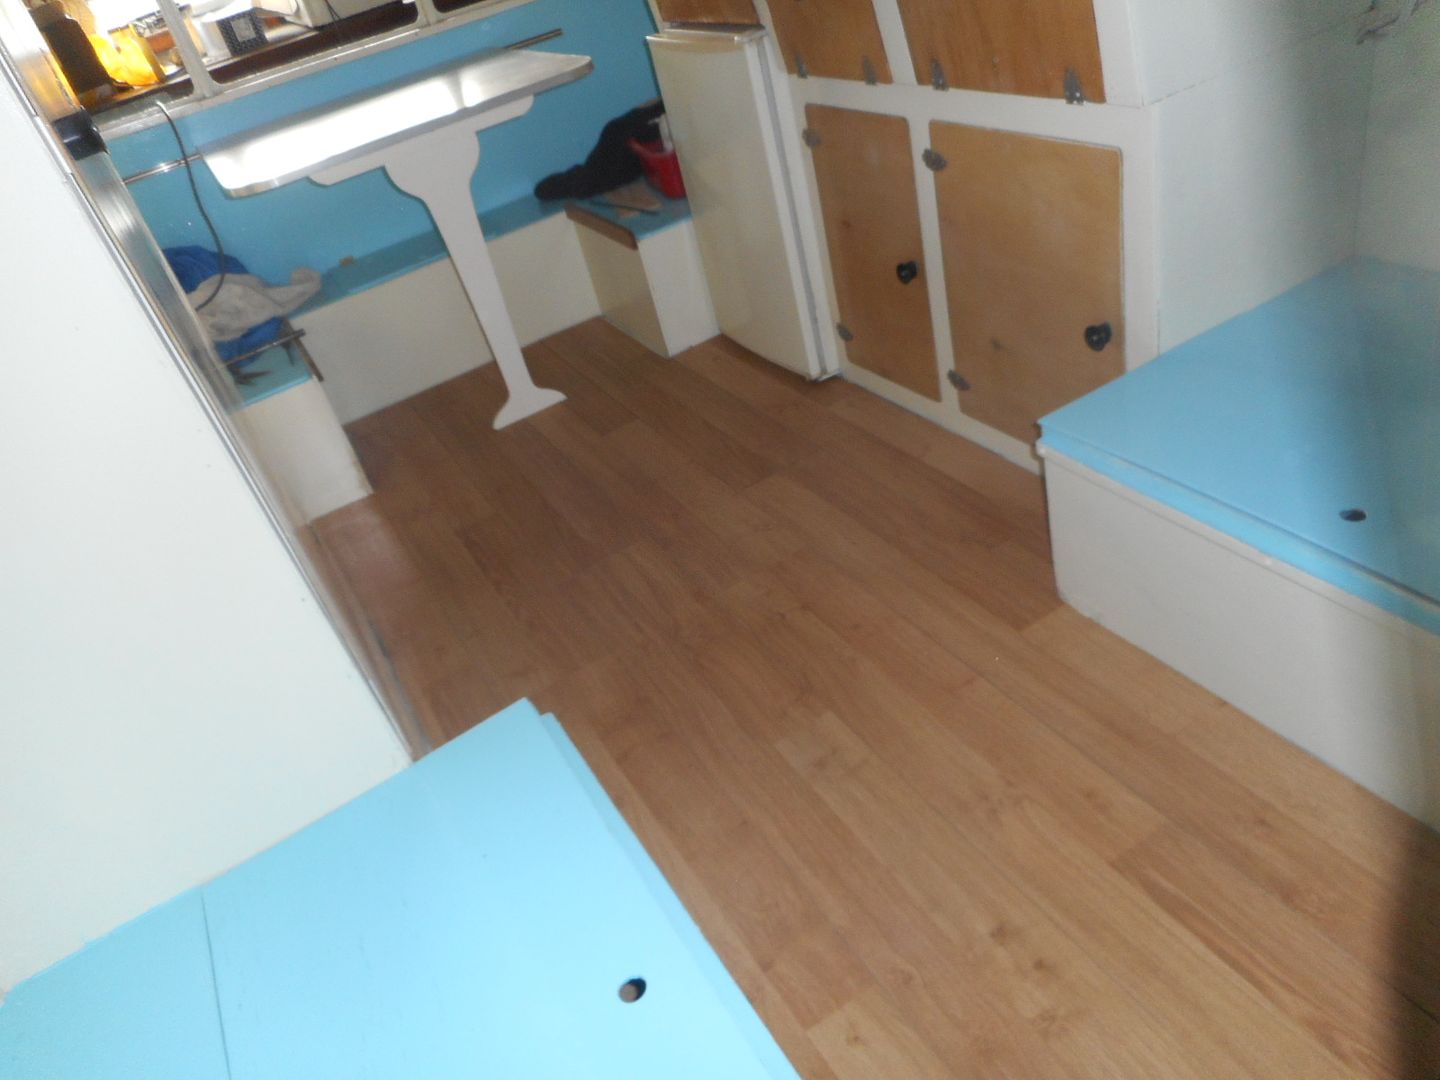
Considering using No More Gaps to fill in between the boards before the cracks fill with bread crumbs , dirt etc..
All good for now..
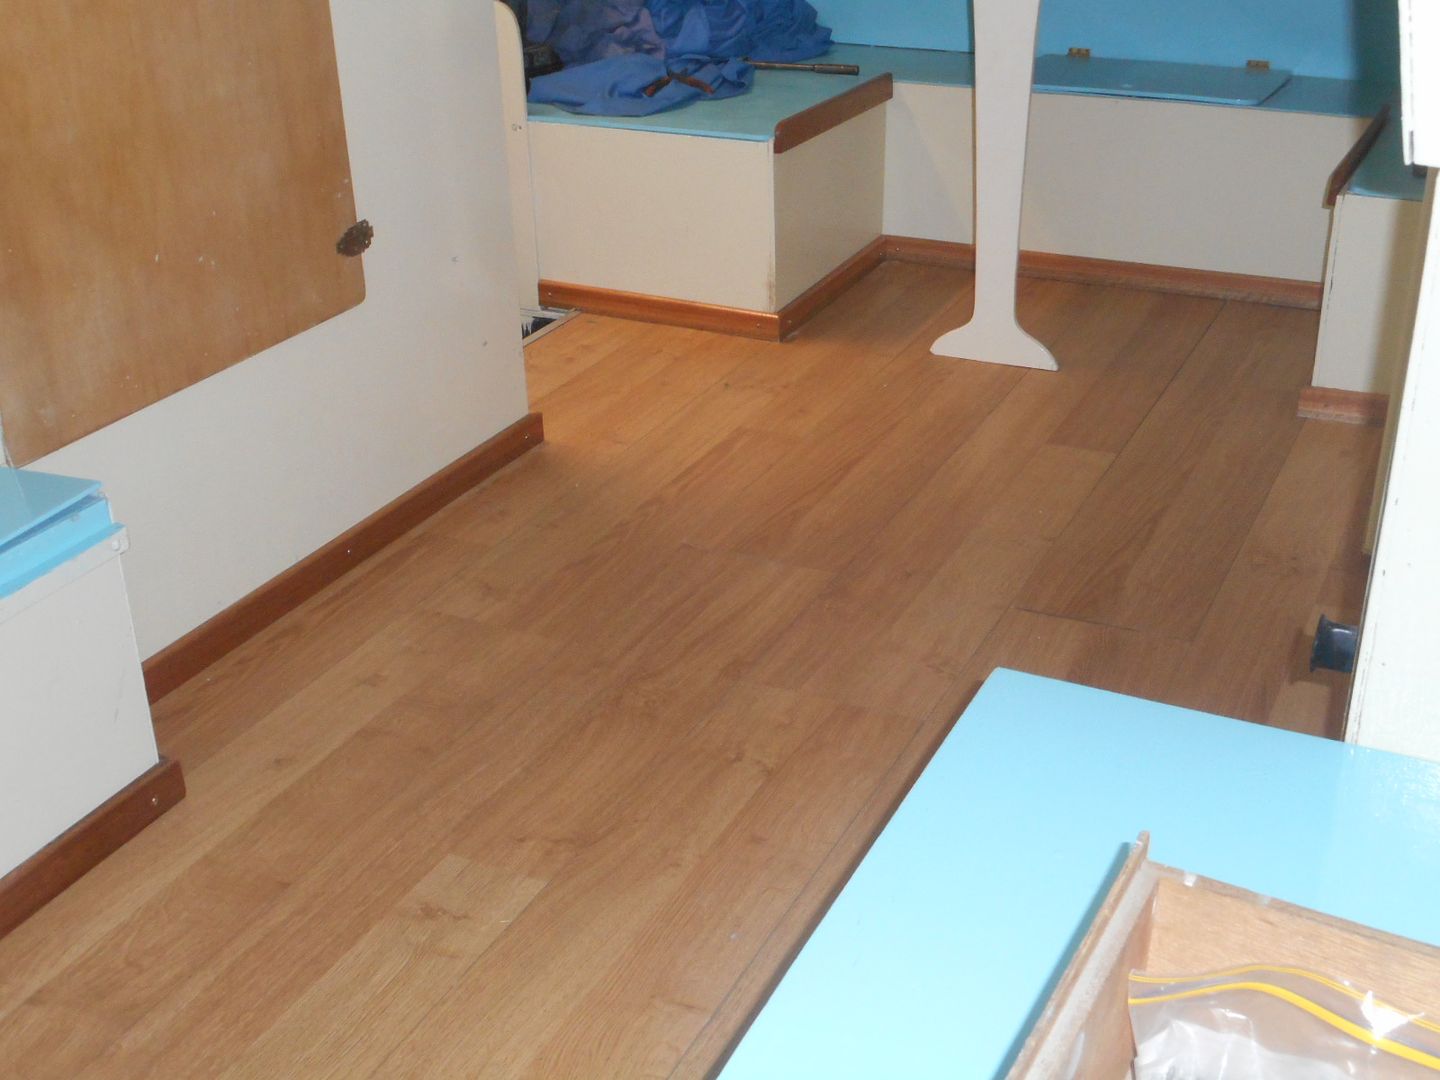
Next step is to fit skirting boards all around the floor to wall areas..
Have clear varnished 3 lengths today with 2 coats. all ready to cut to suit.. fiddly job .. but will tidy things up.. i hope !!!
Reddo
Managed to finish off the table.. fit the marconi rail.
Fit the "Anti cushion fall off timbers"...

I know im not suppose to do the floor covering until last ... but .. it was time i had a good look at the options.
When i bought the van Aquamum threw in about 50 old lino tiles.. Just enough to cover the floor... Greens, yellow, grets, Blues , reds.. I could have had a ball sticking them down...
But as i stated earlier in these posts each tile weighed about 500 grams.. which would have added up to 25 KG on the floor.. the consider that the floor doesnt stay flat when ya walk on 12mm ply unless its really stiffened up under the van.. which it isnt.
So.. would also have issues with the tiles wanting to peel up
So... i dragged down some Formica lamitex flooring i bought at a garage sale for $3,, about 6 years ago..

A few quick measurements and calcs revealed there was just enough boards to fill the floor in the Supalite...
In the end i had to use pin nails through the face of the board to make sure they stayed put.. 99% was "Hidden nailed "and it looks good..
The boards almost got used on the "Not Everyones Cuppa Tea TD" project about 3 years ago... but ...i shelved that idea... thank god i did

Considering using No More Gaps to fill in between the boards before the cracks fill with bread crumbs , dirt etc..
All good for now..
Next step is to fit skirting boards all around the floor to wall areas..
Have clear varnished 3 lengths today with 2 coats. all ready to cut to suit.. fiddly job .. but will tidy things up.. i hope !!!
Reddo
-
Strugglebrook
- Posts: 343
- Joined: Tue Jul 15, 2014 9:53 am
Re: Reddos 1960 Supalite Atlas Resto
Yes Sir Ree , I have seen it today. Lookin good, lookin real good.
Re: Reddos 1960 Supalite Atlas Resto
Todays episode is bought to you by the letters .. 'S " for skirting boards and... "G "for glazing.
Sailed through the skirting board exercise...all done by about 10.00am..
Then got to thinking about fitting windows..
Spent 2 hours cleaning off 50+ years worth of silastic and paint from the glass panels... Then realised i would need some 10mm X 10mm moulding to nail in after the glass was fitted... so.. for the 256th time since starting the work on the van i set off to the big green shed to make another community contribution.
Came home with enough tassie Oak square mould to trim around the 6 fixed windows in the van..
as well as some 18 X 12 mm to make the fly screen frames out of.. ( later on ).
Anyone that knows me will tell you that Glass + hammer+ nails + Reddo = broken glass = swearing + heartache..
However.. i managed to seal in the 3 front windows and nail off the internal moulds without so much as a swear word or shattered pane of glass....
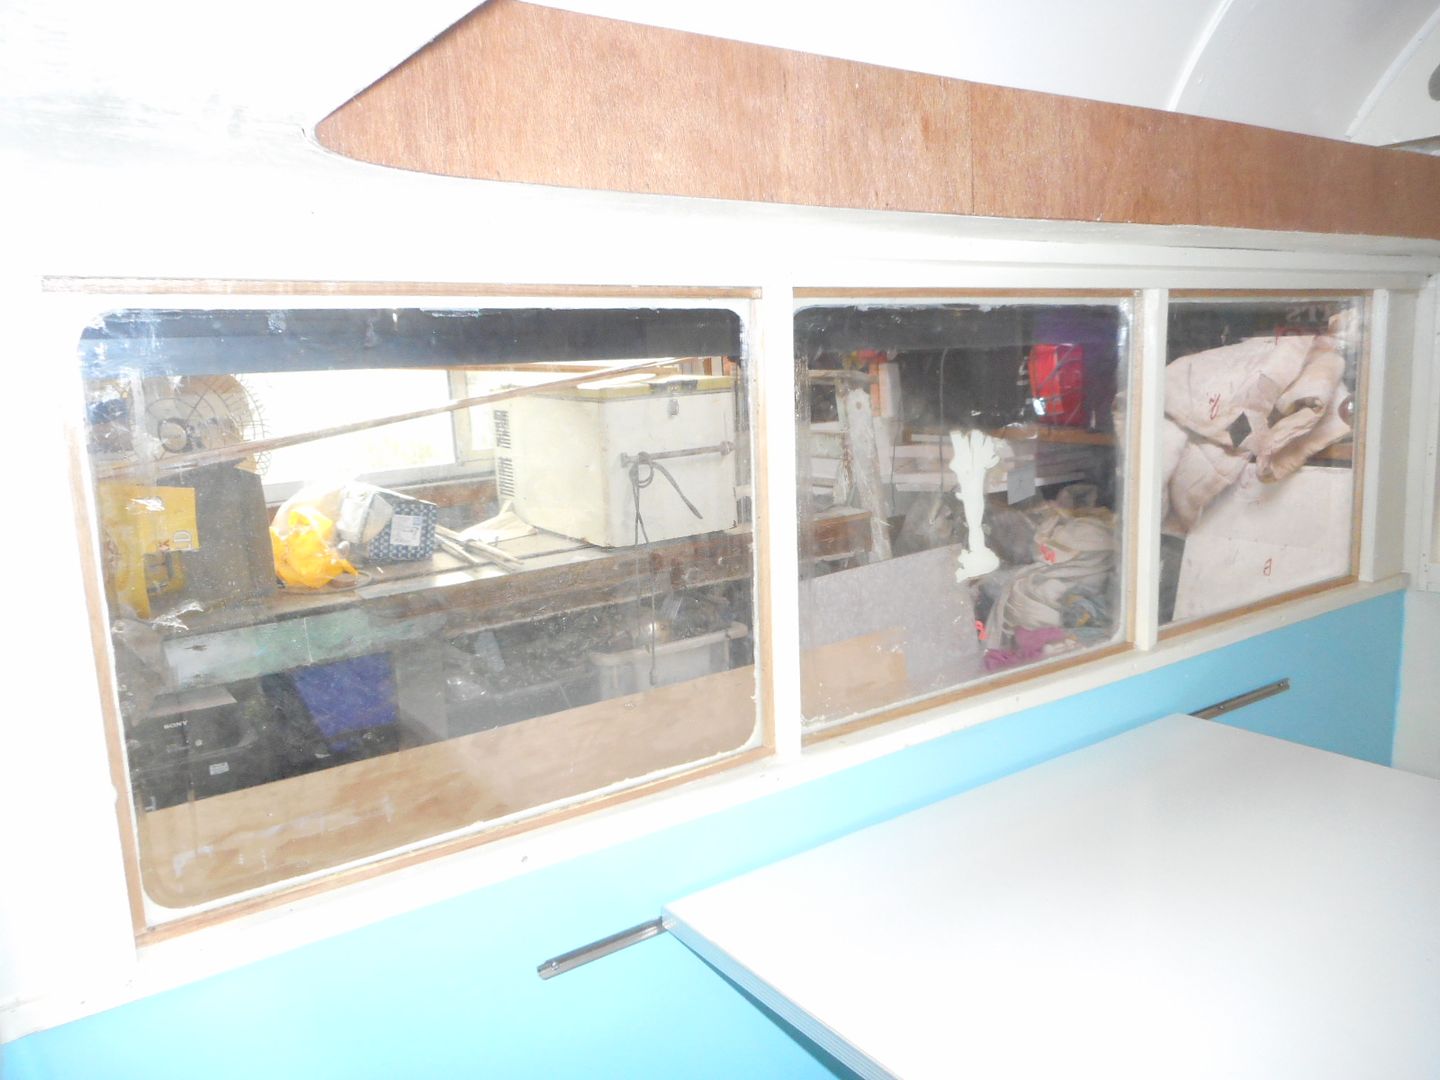
Yeah .. yeah.. Ok .. they might be thilthy but they arent broken..
OK !!!!
Perhaps i can put my good fortune down to the chick on the front middle window
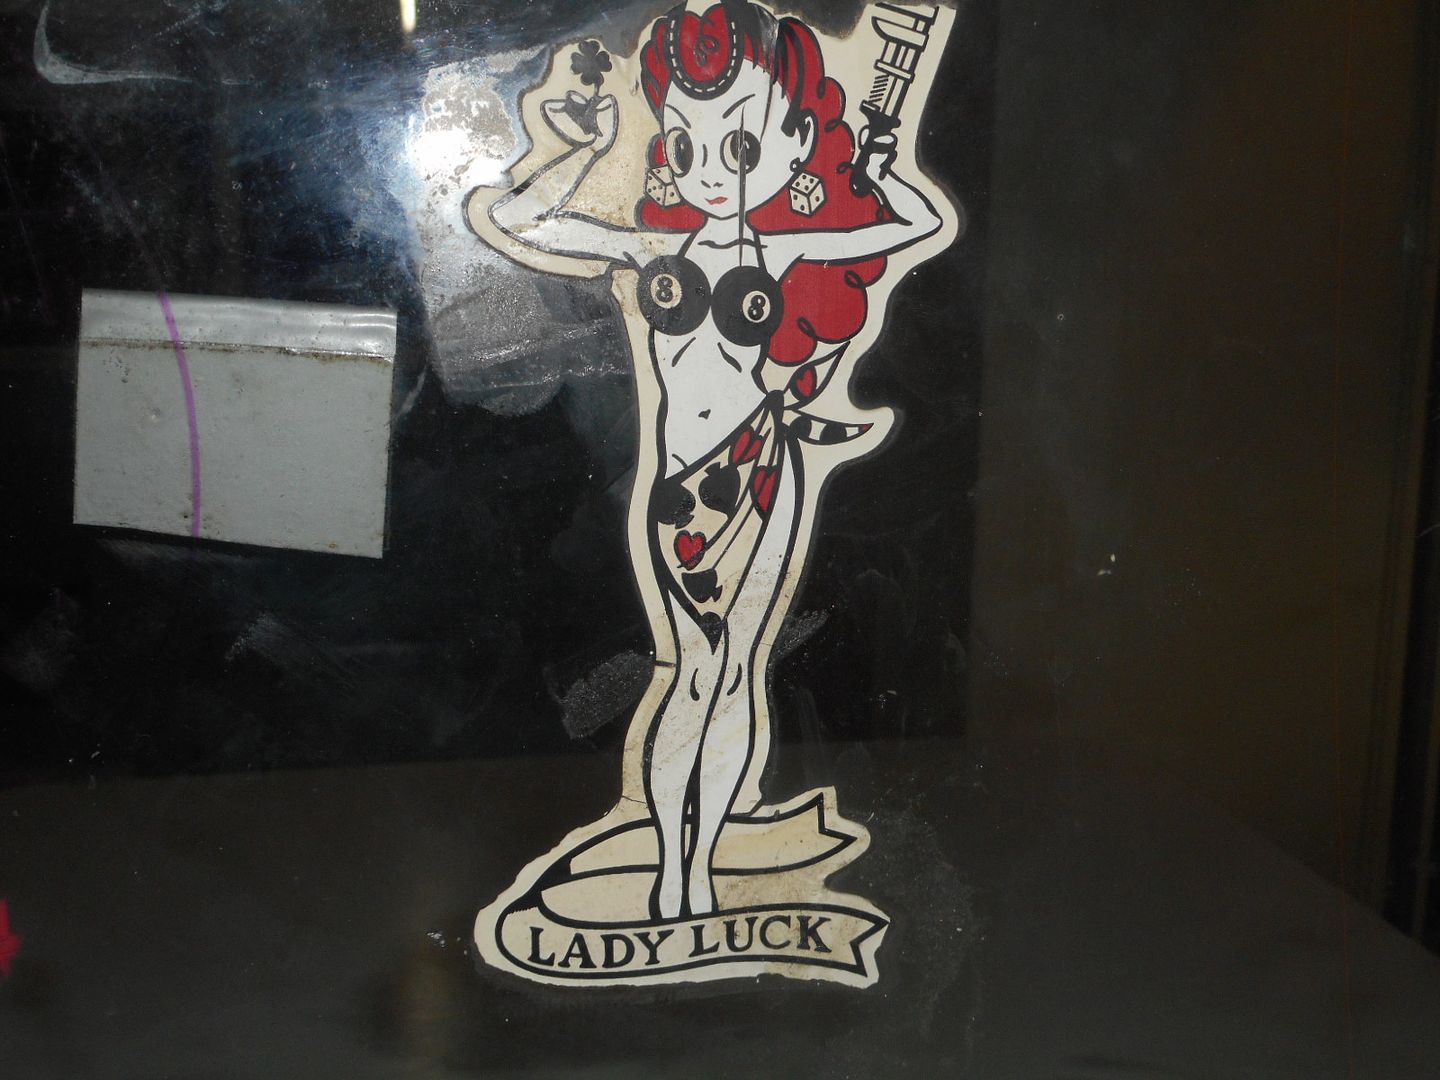
Just hoping my luck hangs out long enough to get the back 3 in place tomorrow...
Reddo
Sailed through the skirting board exercise...all done by about 10.00am..

Then got to thinking about fitting windows..
Spent 2 hours cleaning off 50+ years worth of silastic and paint from the glass panels... Then realised i would need some 10mm X 10mm moulding to nail in after the glass was fitted... so.. for the 256th time since starting the work on the van i set off to the big green shed to make another community contribution.
Came home with enough tassie Oak square mould to trim around the 6 fixed windows in the van..
as well as some 18 X 12 mm to make the fly screen frames out of.. ( later on ).
Anyone that knows me will tell you that Glass + hammer+ nails + Reddo = broken glass = swearing + heartache..
However.. i managed to seal in the 3 front windows and nail off the internal moulds without so much as a swear word or shattered pane of glass....

Yeah .. yeah.. Ok .. they might be thilthy but they arent broken..
OK !!!!
Perhaps i can put my good fortune down to the chick on the front middle window

Just hoping my luck hangs out long enough to get the back 3 in place tomorrow...
Reddo
Re: Reddos 1960 Supalite Atlas Resto
Hi all
Progress on the Atlas has been steady..
Got the back three windows in .. all done .. no breakages.
Just gotta hope they dont leak when they get the water test outside in the yard.
Moved on to the seat cushions..
Trolled the "Free and Giveaways " on Gumtree and scored a 2 x1 seater + 1 X 2seater lounge in the neighborhood.
The seat cushions from the single seats fitted straight into the dinette bases ... near perfect
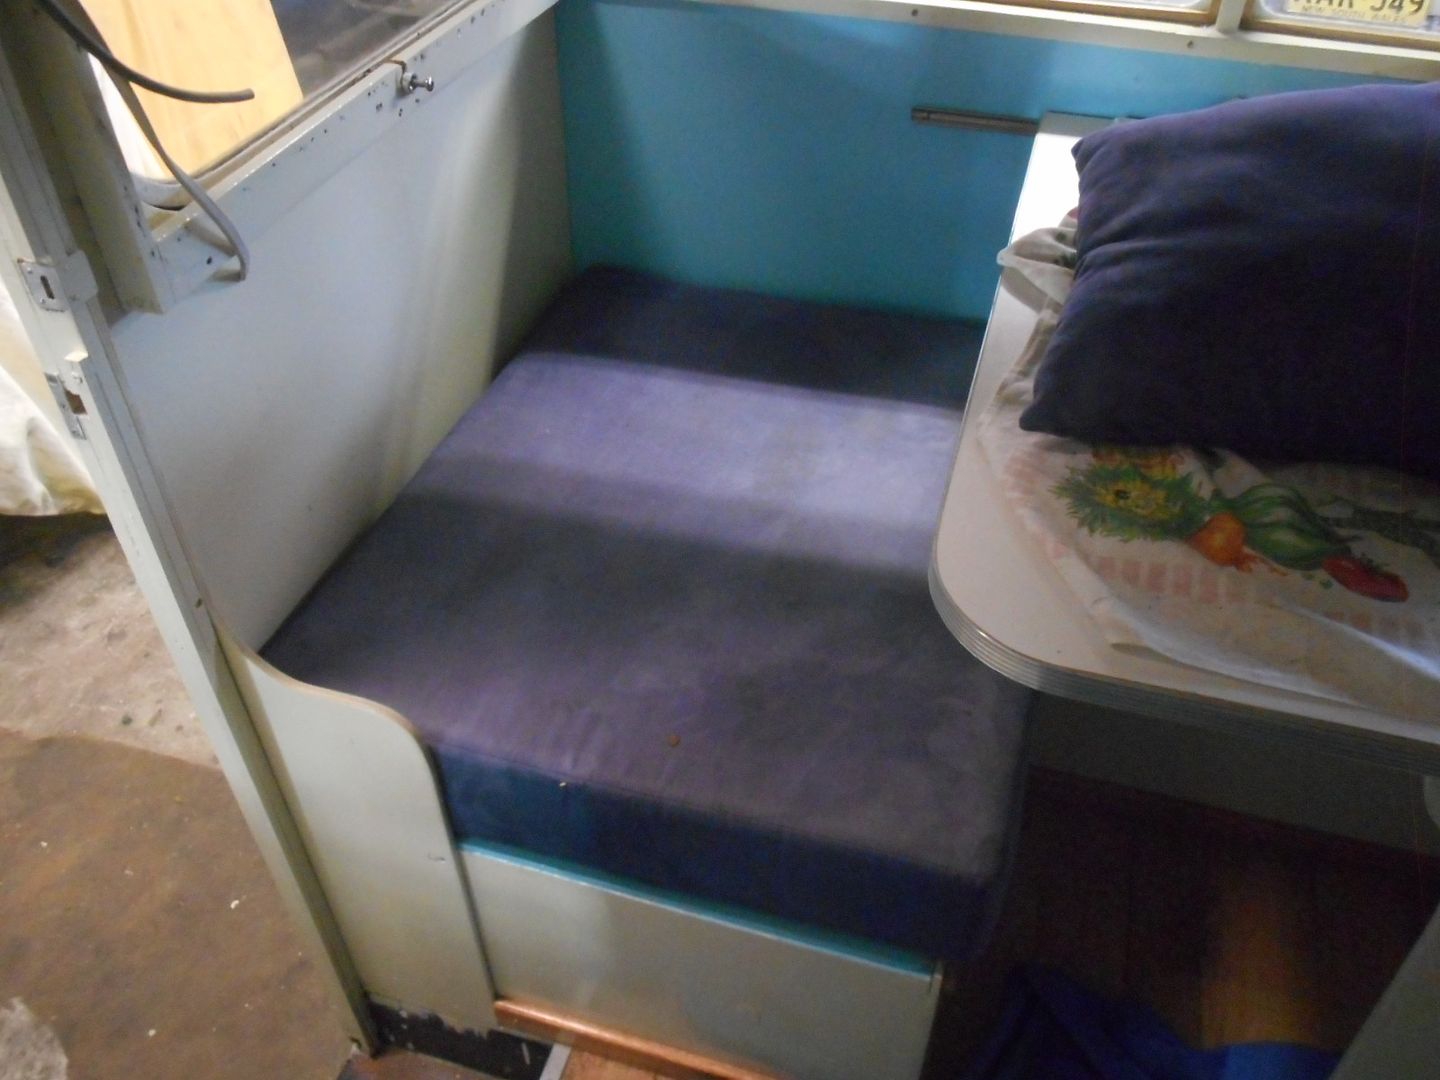
But i couldnt be that lucky with the back cushions... So i set about stripping sections of good material off the lounges and gave the 2 cushions and the material to a local upholsterer to make the correct size backs.. all up the seats will cost me $90..
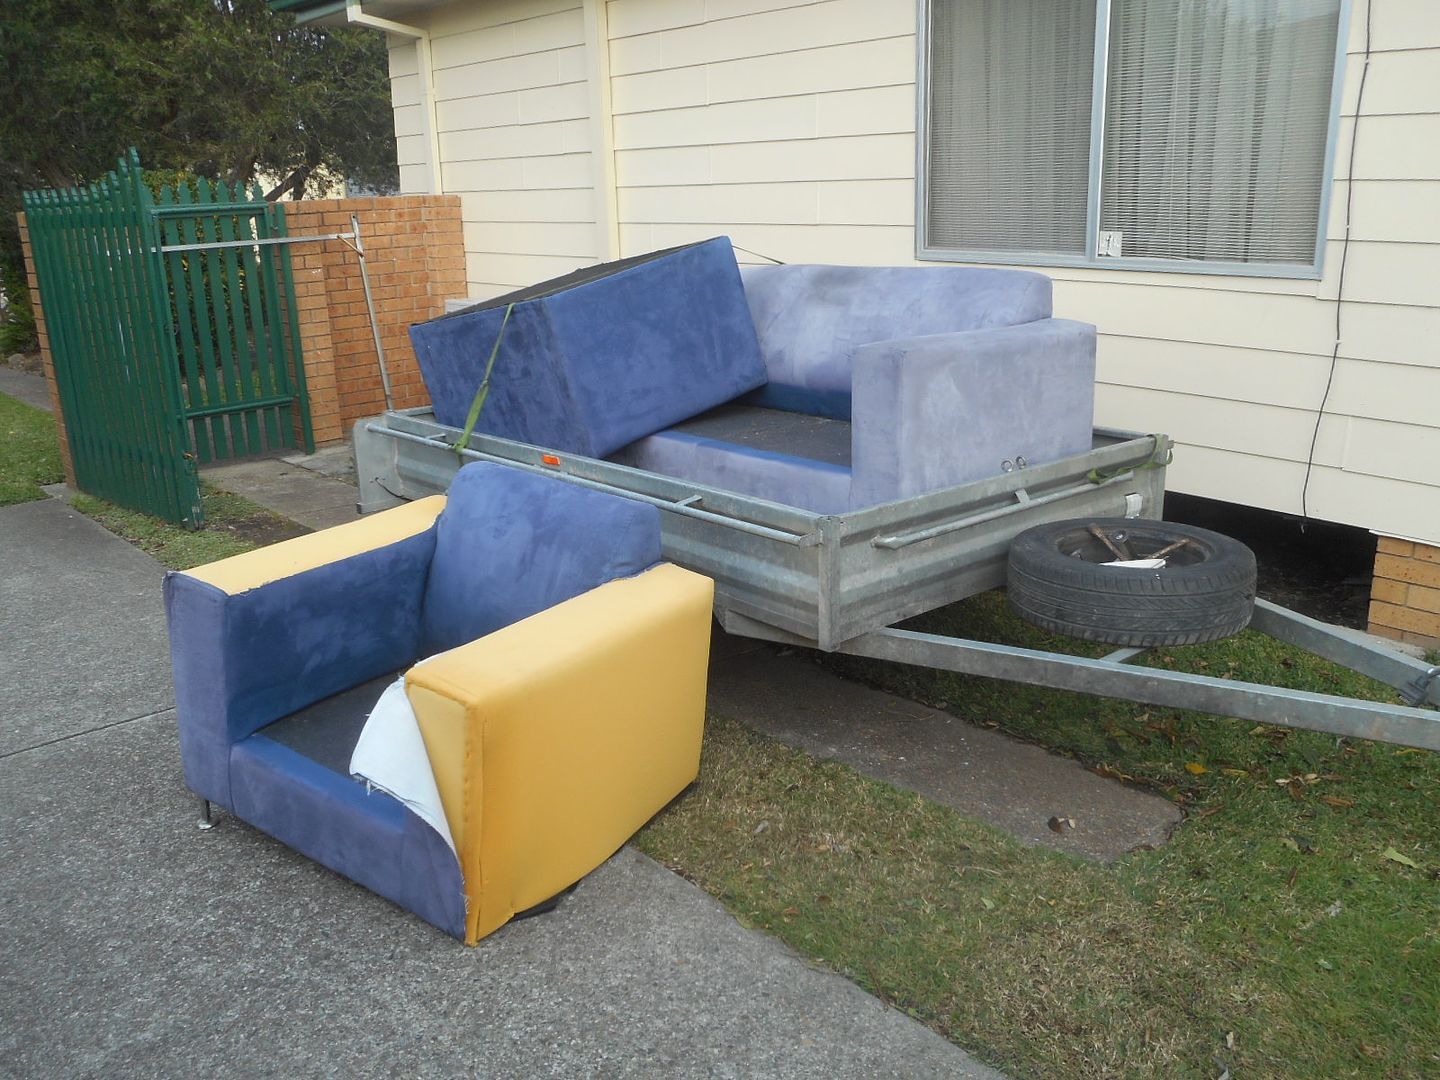
The reason most people giveaway their old lounges is that the local tip wont take em.. also the teason that we see so many of them dumped on the side of the road and in the bush.. they contain sponge rubber and the tip wont accept them..
So.. to get around that i tried my hand at upholstery...
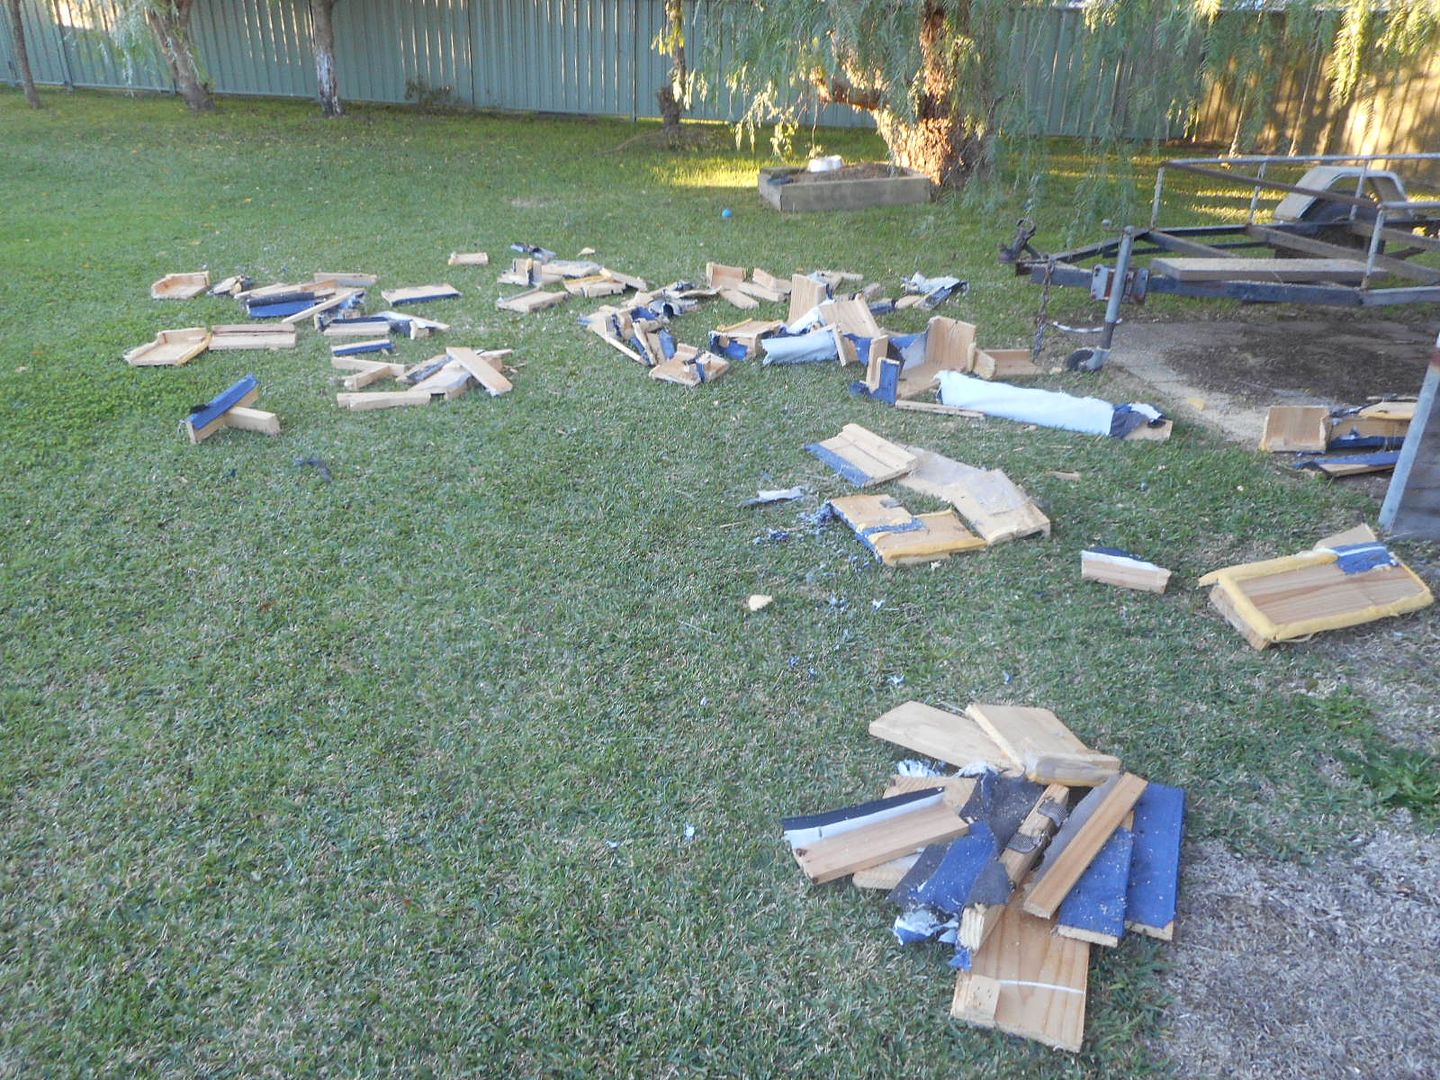

But things went wrong and i got cranky..
From there i moved on to the electrical side of things...
One of the probs with single skin vans is running wires so they are concealed..
Getting wires from the top cupboards down to the bottom cupboards and around the shelves can be a problem..
So.. i created a "service duct "that sorta blended in with the bench top..
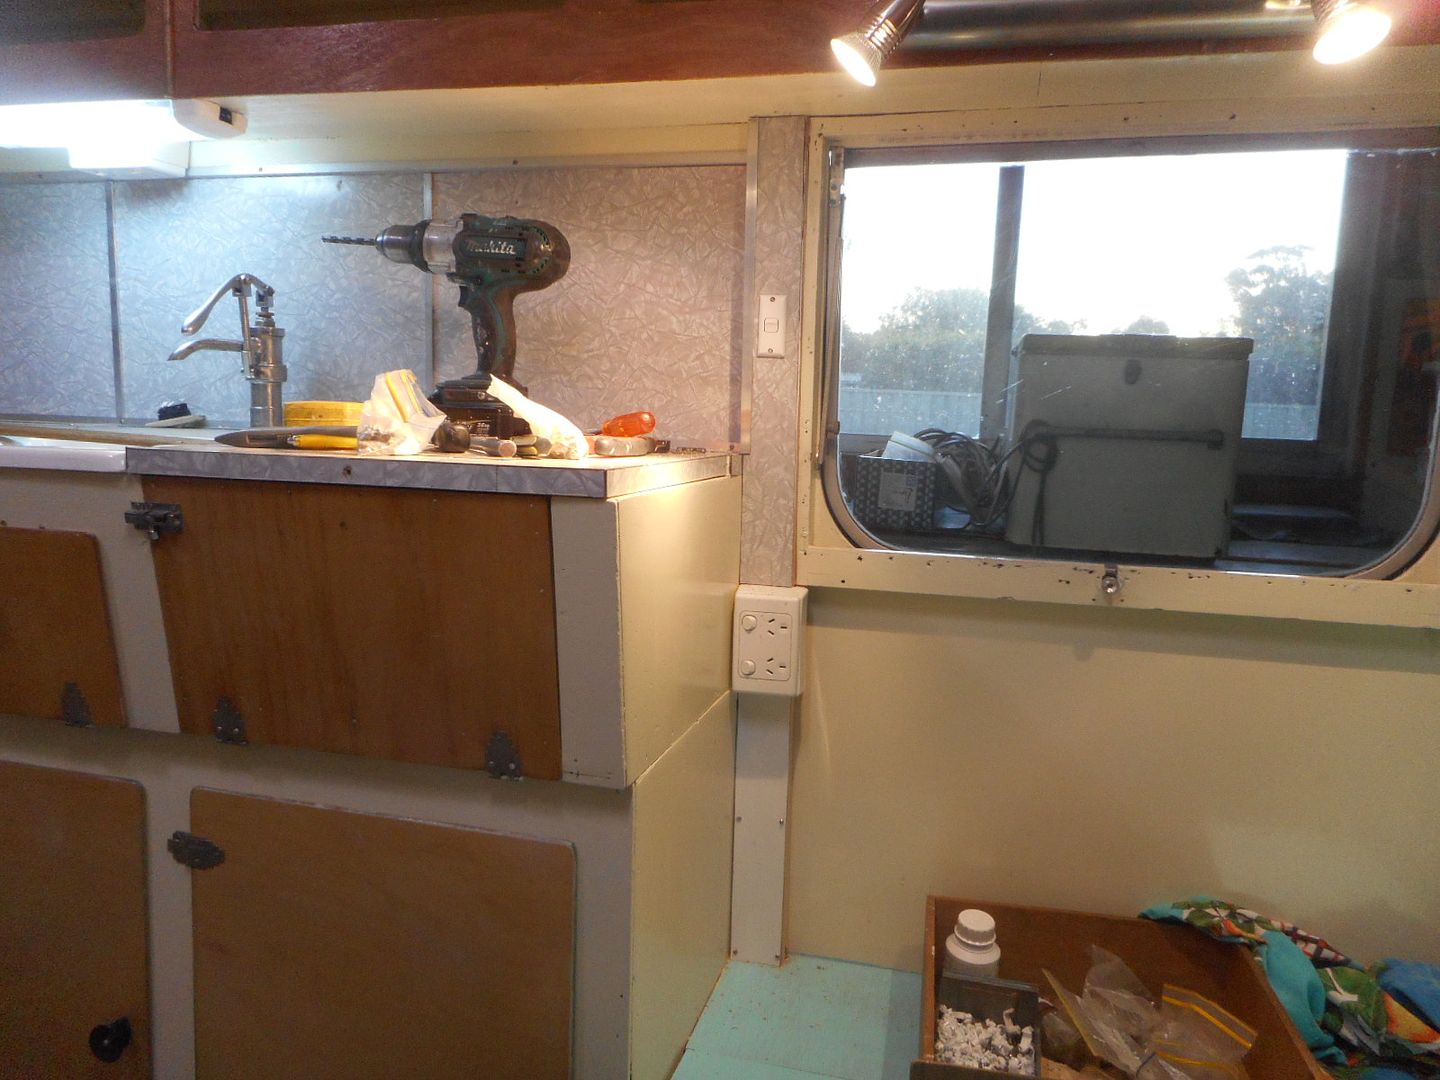
There iis a stack of wires running around that shelf i built... and .. i hate the look of the wires and clips.. might not have been so bad if i could have found some old brass pin clips but the new cable clips look crap .. and would still look crap even if i painted the wires and clips..
So i built a duct for these out of pine and meranti..
Looks tidier now..
... will post this bit then continue the story ...
Reddo
Progress on the Atlas has been steady..
Got the back three windows in .. all done .. no breakages.
Just gotta hope they dont leak when they get the water test outside in the yard.
Moved on to the seat cushions..
Trolled the "Free and Giveaways " on Gumtree and scored a 2 x1 seater + 1 X 2seater lounge in the neighborhood.
The seat cushions from the single seats fitted straight into the dinette bases ... near perfect

But i couldnt be that lucky with the back cushions... So i set about stripping sections of good material off the lounges and gave the 2 cushions and the material to a local upholsterer to make the correct size backs.. all up the seats will cost me $90..

The reason most people giveaway their old lounges is that the local tip wont take em.. also the teason that we see so many of them dumped on the side of the road and in the bush.. they contain sponge rubber and the tip wont accept them..
So..

But things went wrong and i got cranky..
From there i moved on to the electrical side of things...
One of the probs with single skin vans is running wires so they are concealed..
Getting wires from the top cupboards down to the bottom cupboards and around the shelves can be a problem..
So.. i created a "service duct "that sorta blended in with the bench top..

There iis a stack of wires running around that shelf i built... and .. i hate the look of the wires and clips.. might not have been so bad if i could have found some old brass pin clips but the new cable clips look crap .. and would still look crap even if i painted the wires and clips..

So i built a duct for these out of pine and meranti..
Looks tidier now..

... will post this bit then continue the story ...
Reddo