The life and times of "Matilda" The 1956 Bondwood Fairway

Photos and Information on Members Caravans. This a great place to introduce yourself.
reddo
Posts: 1126
Joined: Fri Jan 30, 2009 1:09 pm
Location: Lake Macquarie

The life and times of "Matilda" The 1956 Bondwood Fairway

Post by reddo »

Hi All

Well after getting Matilda back home from "Jules and Burts" place at Springwood up the Blue Mountains .
I spent a few days just walking around it pushing and poking at things that needed a tidy up and then sorting them in order of "Need to do" Nice to do".

So... No:1 priority on the Need to do list was the roof hatch.
A lot of the vans I have owned have had problems with the timber in the frame of the hatch... usually because the manufacturer didn't bother giving the timber ( usually softwood ) a good coat of oil based primer and oil based top coat(s). It appears "Fairway" where guilty of the same offence.
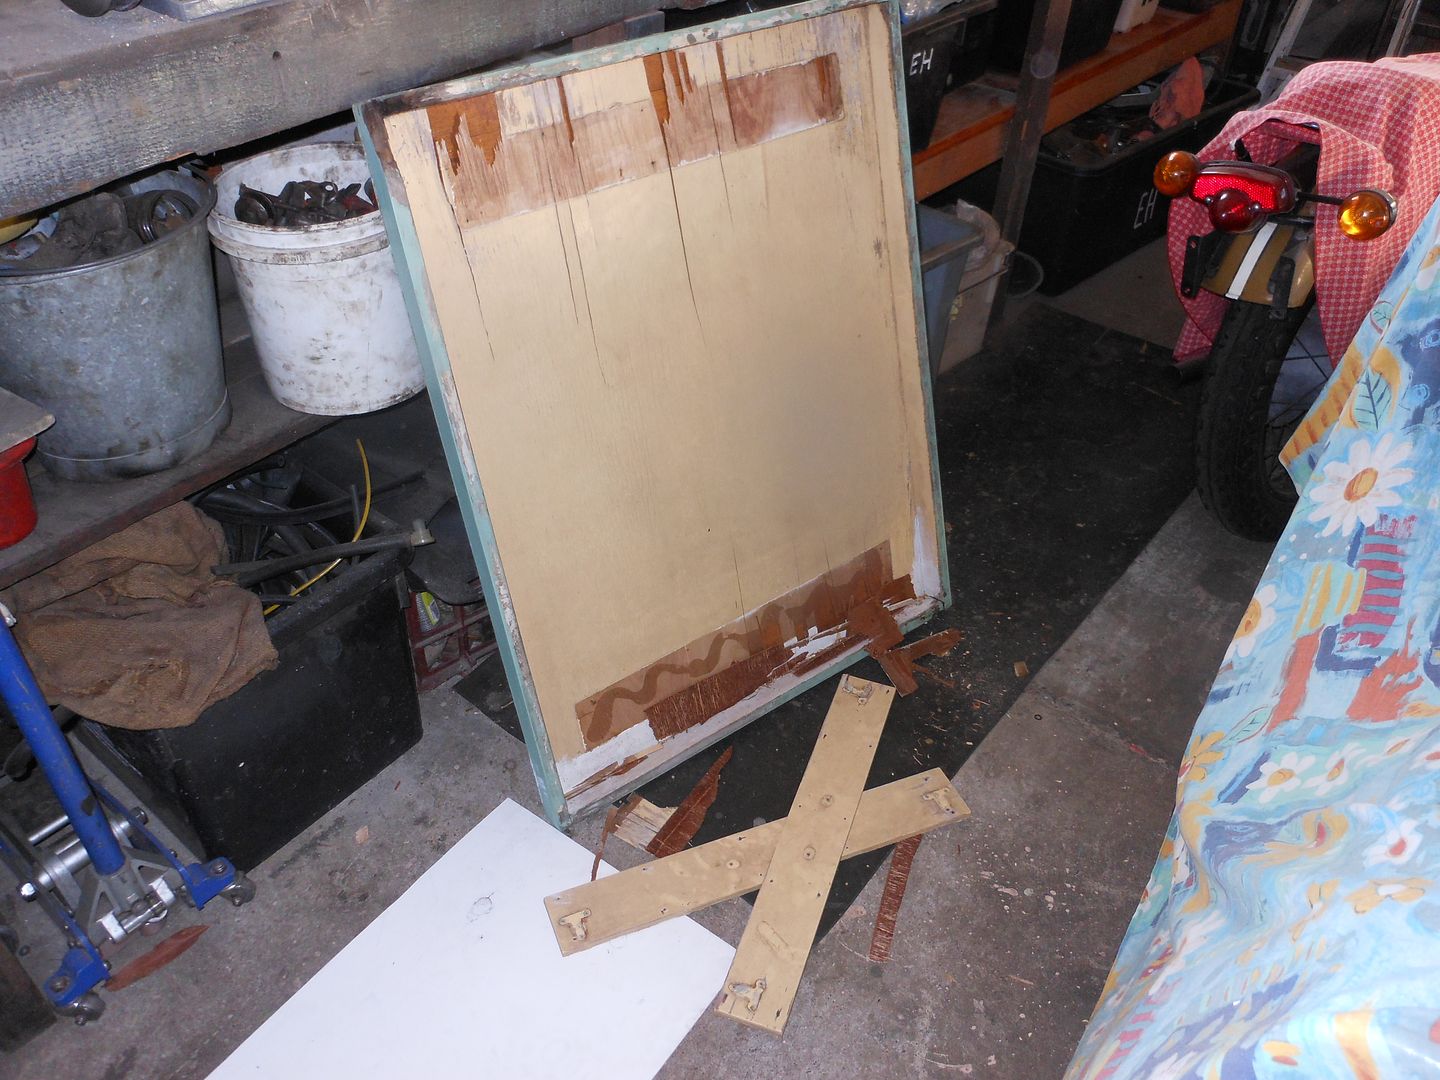
The 40mm X 19mm frame had rotted on a couple of the corners .
So.. off came the hatch ..
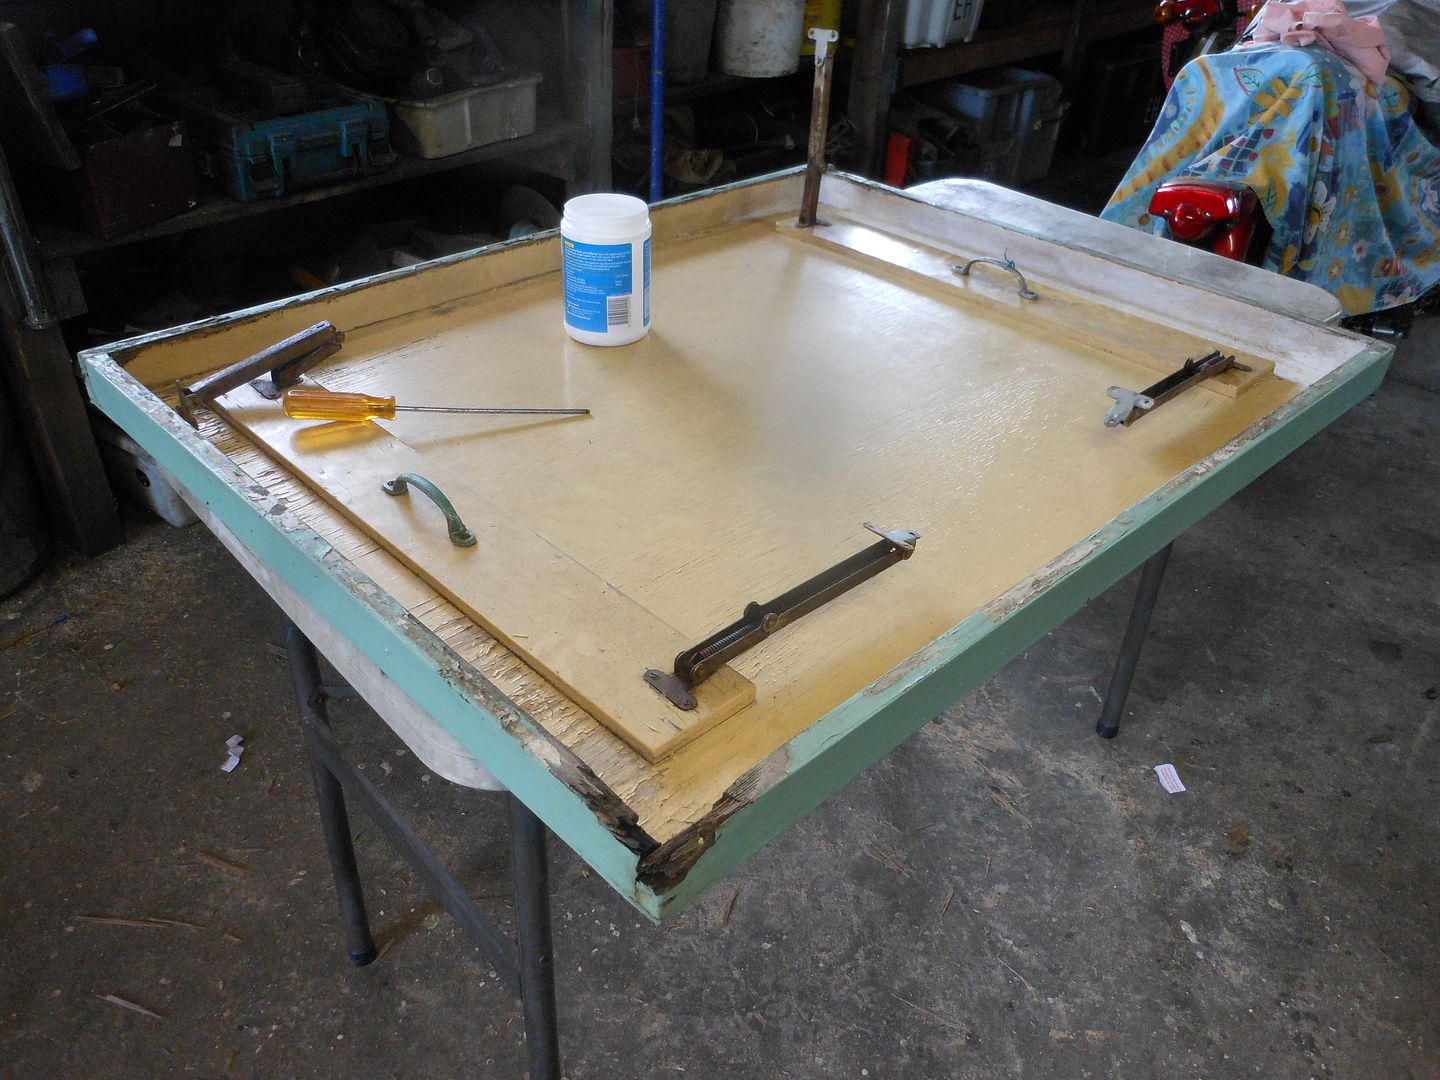
Image
Soon became obvious that it would be quicker and better to simply build another hatch....so.. tossed the old one...
Image

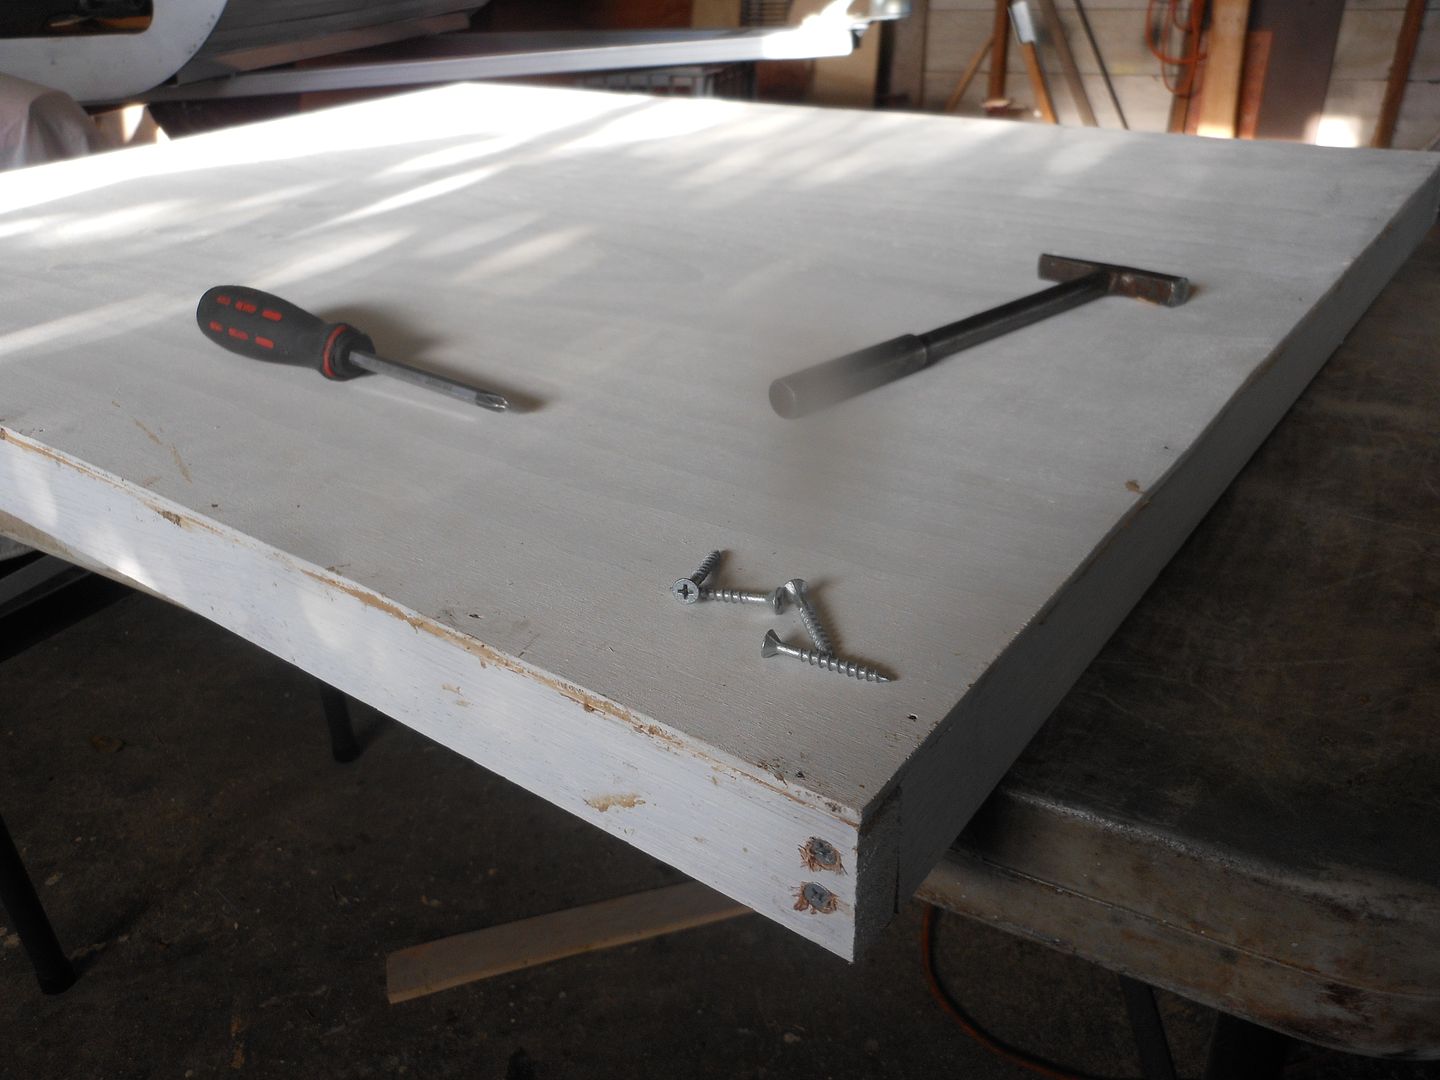
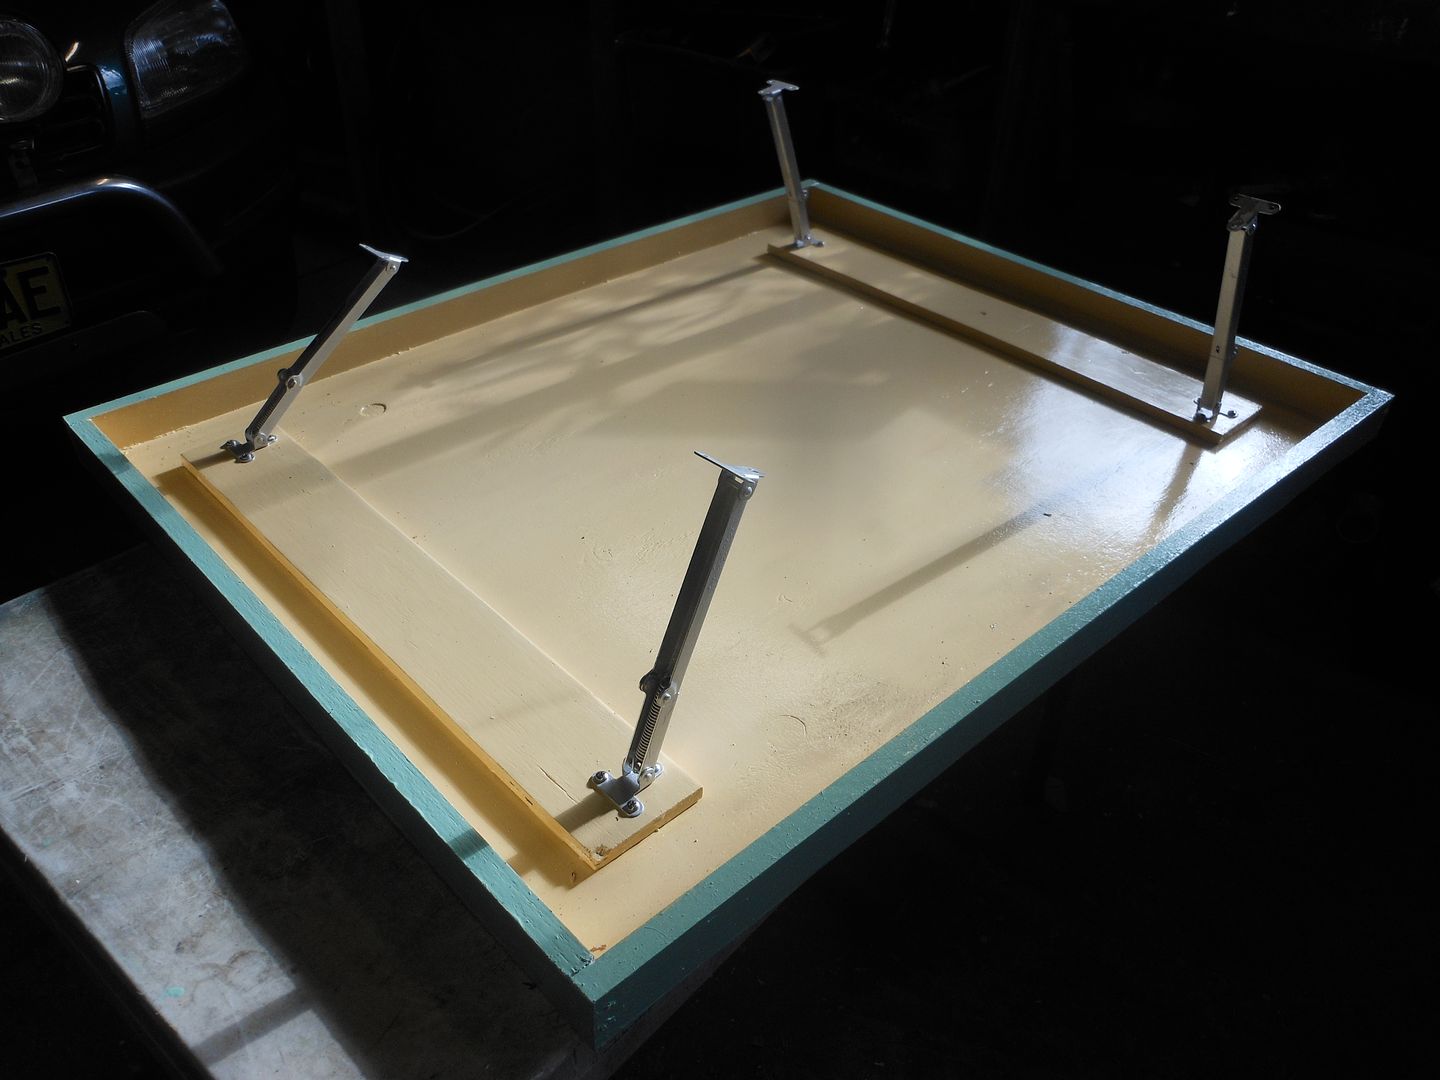
Set about building the new one. Glued and screwed all the corners together. I used 40mm X8G External decking galv screws and Liquid nails. Nice easy carpentry job...
Image
2 coats of Taubmans primer sealer undercoat and leave it overnight.
Next day 2 coast of Dulux "Birdseed" .. it has become a Reddo fleet colour..... on the inside .. let dry .. then 2 coats of another Fleet colour Dulux "Eau-De-Nil".. let dry.

While the hatch was drying I moved onto another "need to do" jog.
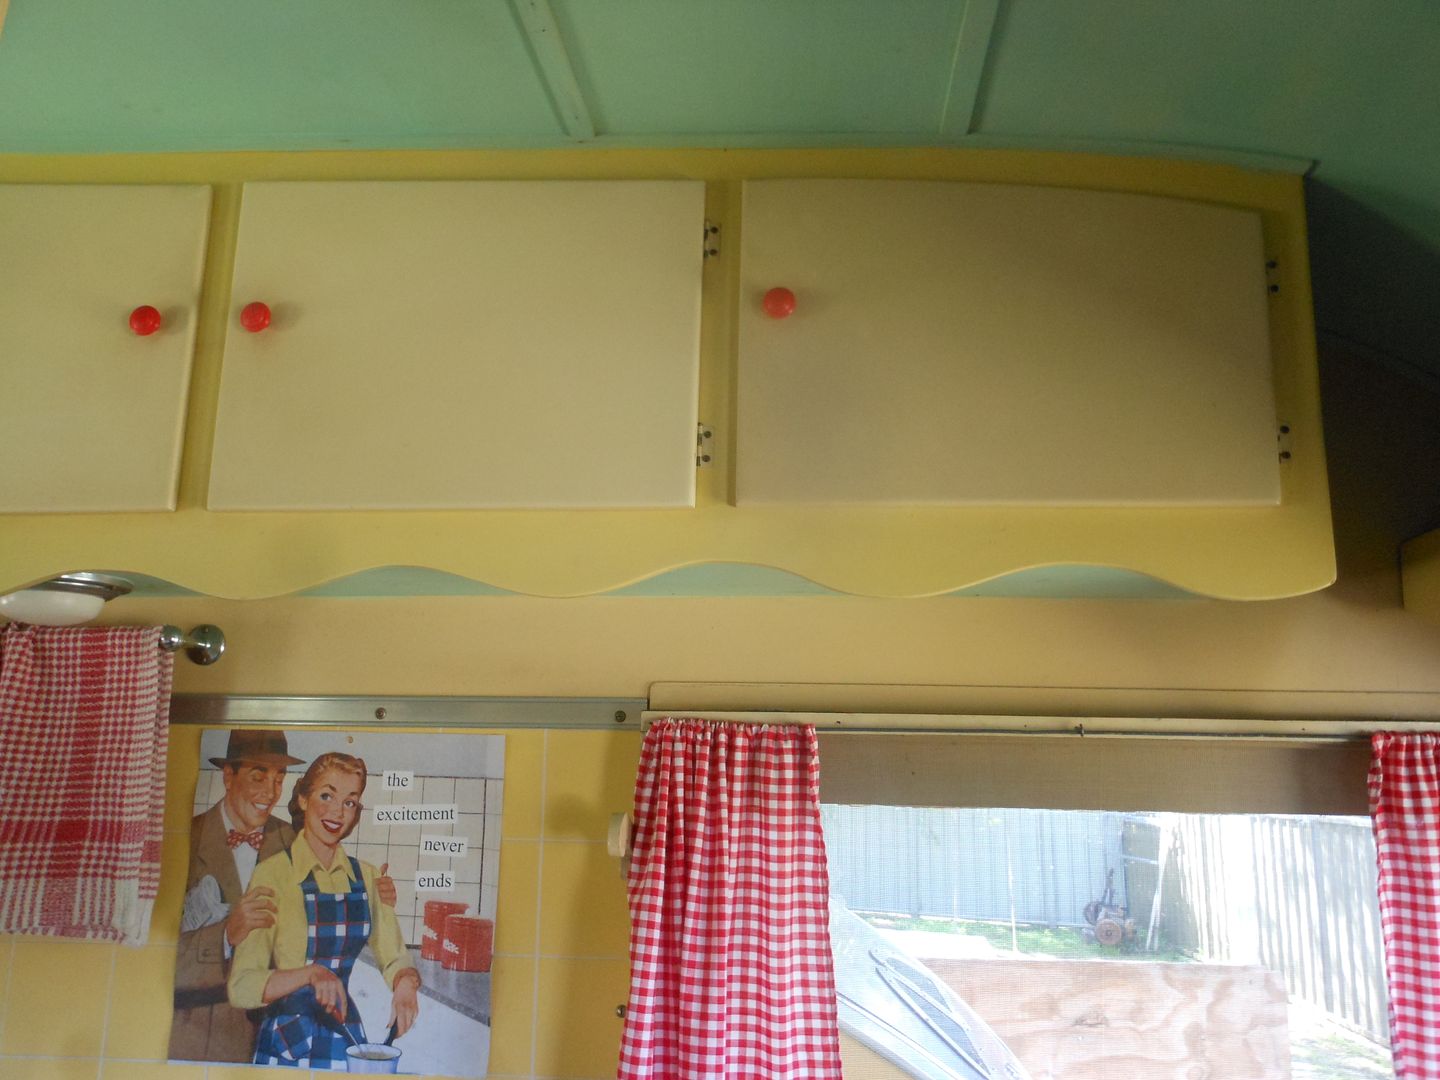
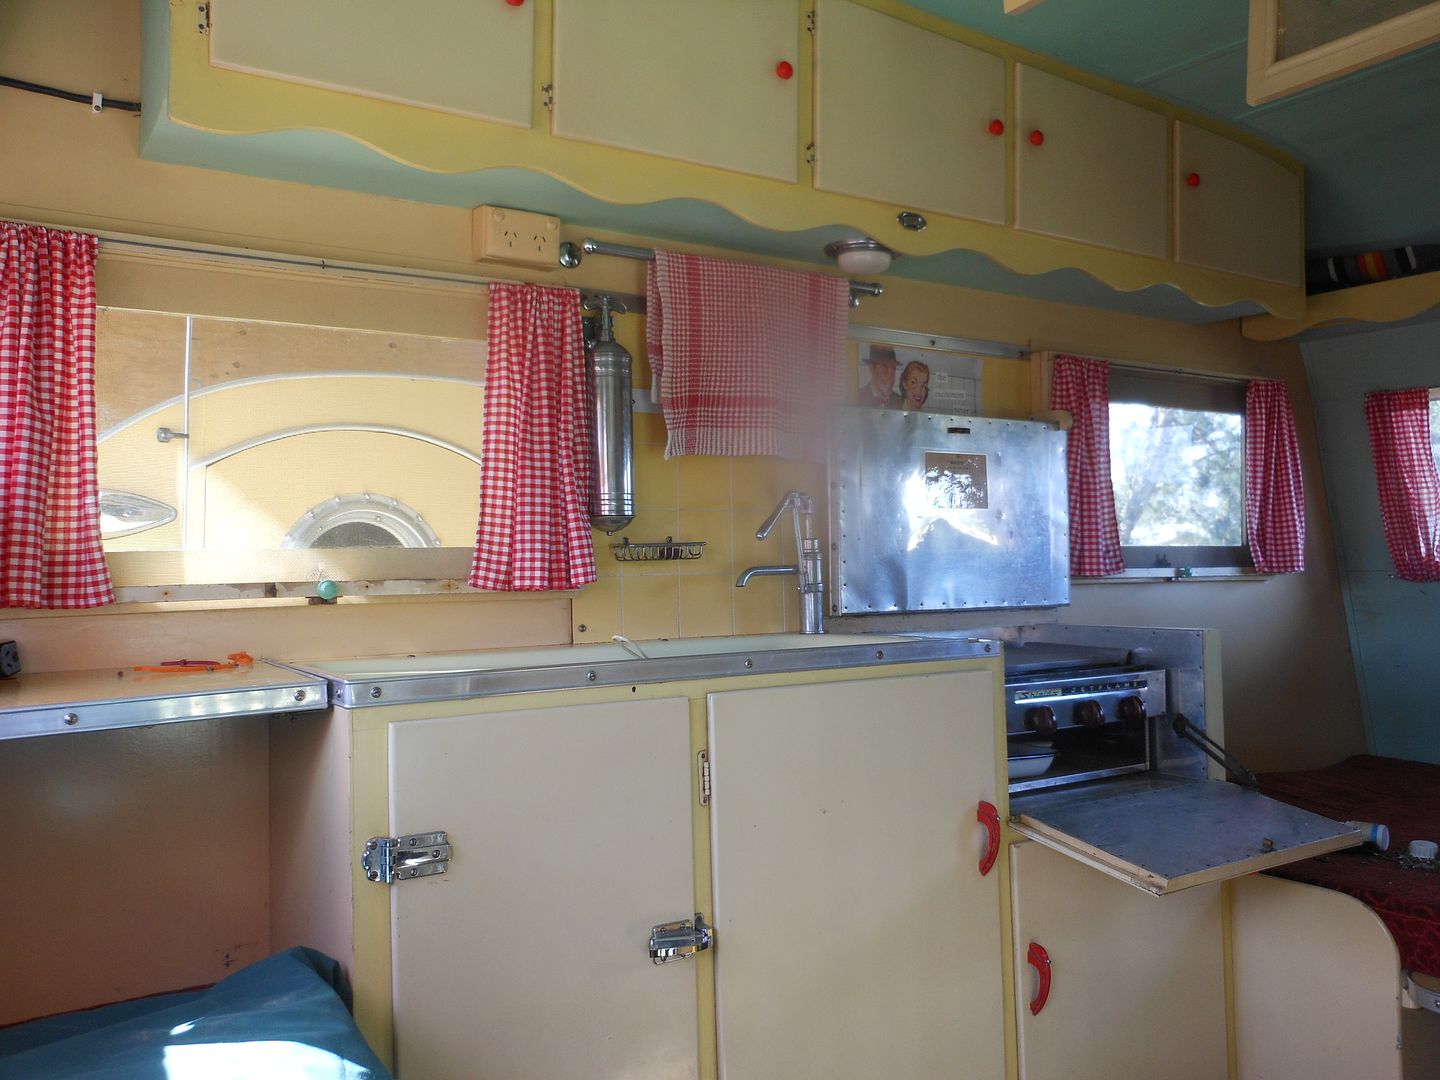
Scrubbing the cupboard doors with liquid Ajax gel.... I had tried using car polish to cut the muck off the doors .. with little effect. So , Trish arrived on the scene with the Ajax... bloody bewdy I thought.. she is going to do some scrubbing, While I was talking to her with my back turned ,she made good her escape... leaving me to spend the next 3 hours scrubbing doors and walls...
You can see the difference on these two doors.. Right side untouched
Image
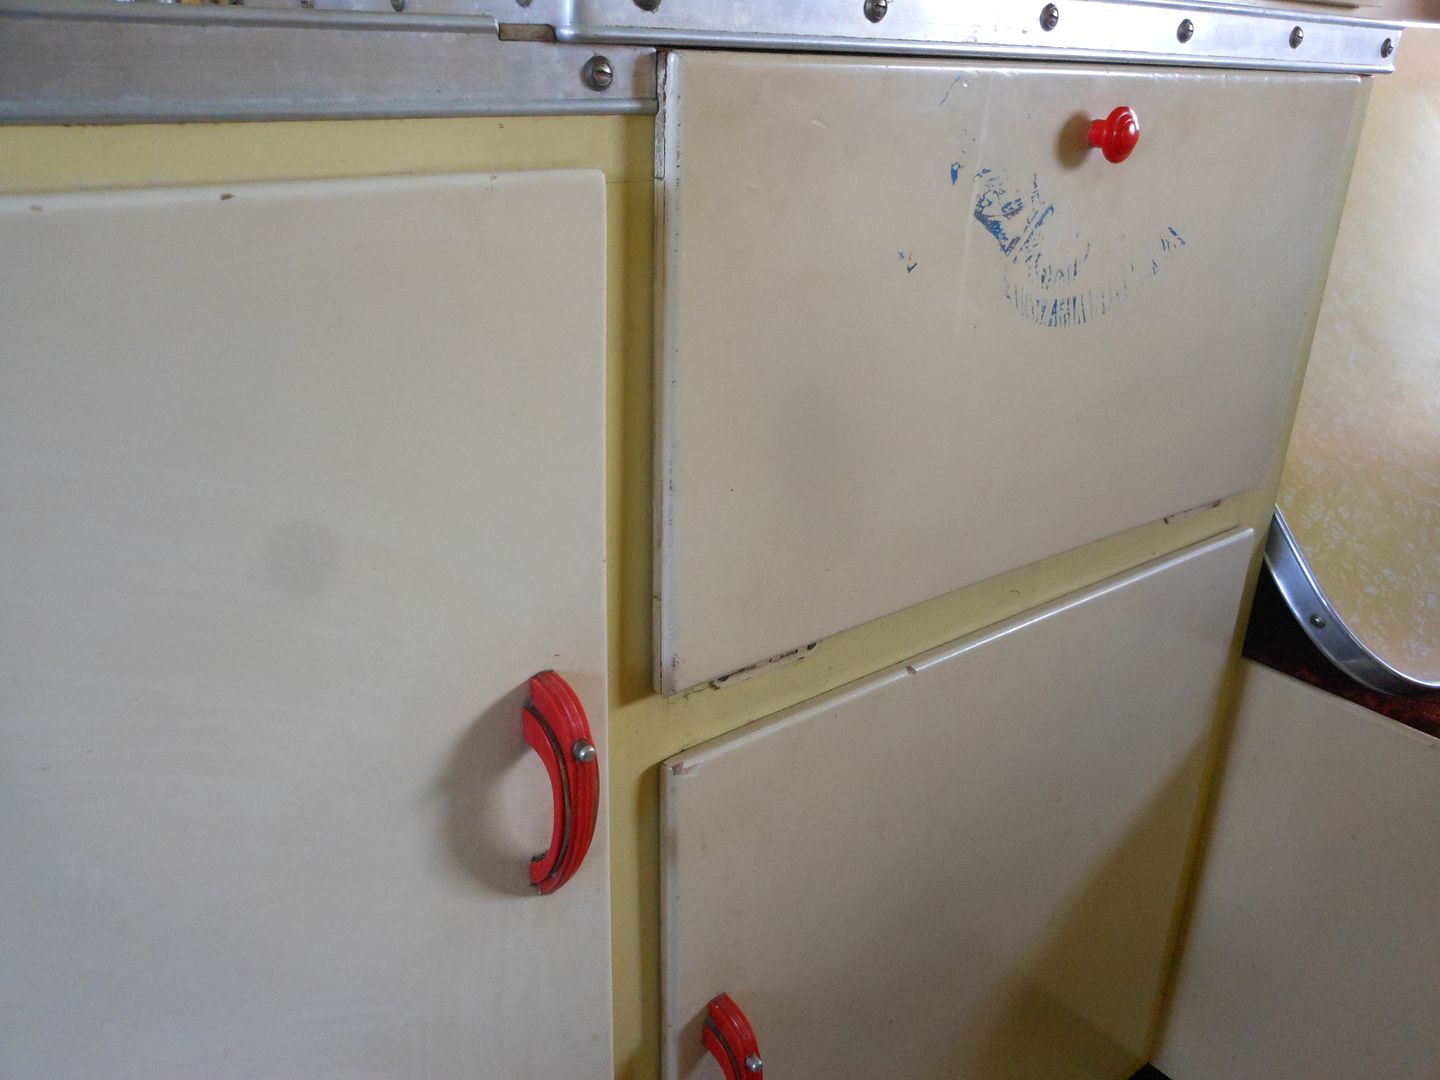
left side done .. right side looked to be a problem.. that ink stain has been there since I bought the van back in 2006... petrol wouldn't move the stain.. Ajax did
Image
By the end of the day I had the cupboard doors and surrounds shining like a new pin..
Image

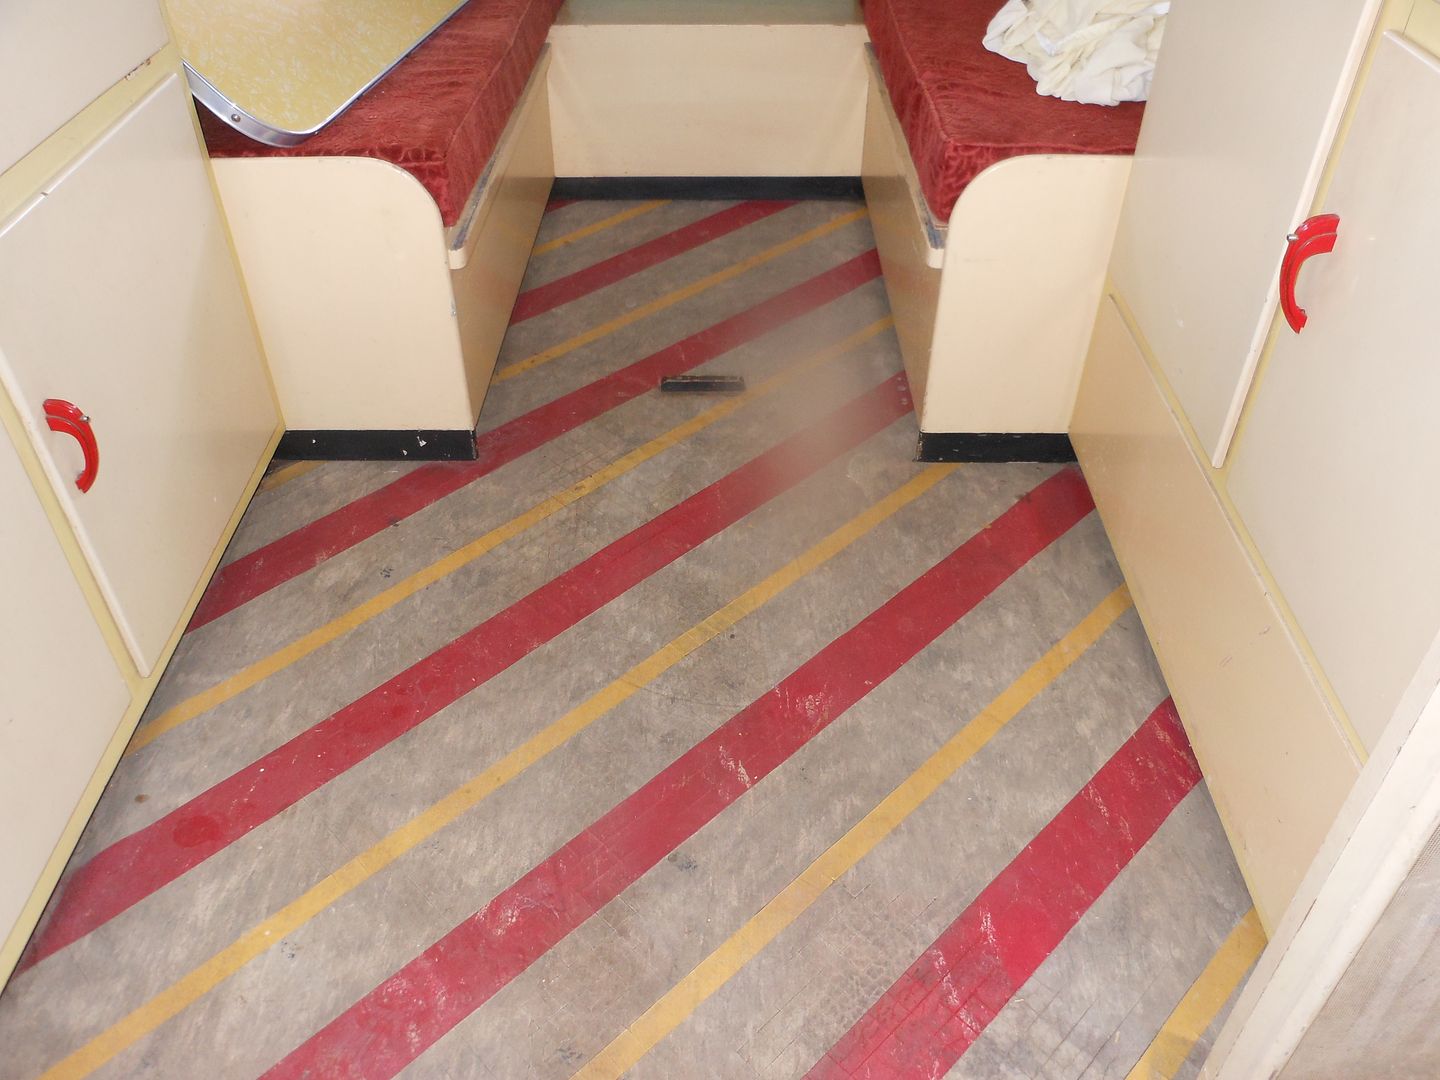
Feeling chuffed with the progress I collapsed to the floor.. Trish arrived with a bucket of warm water and a scrubbing/ scour pad.. again I thought she was going to get involved.. again I was let down.. so .. back in I went on hands and knees and gave the floor a scrub. I remember giving the van a good mopping and air out after it had 100mm of water through it back in the 2007 Newcastle floods.

Never did get the lino looking fresh.. so .. here was my chance to try and brighten things up...
Half the lino is in reasonable condition .. but is "Tesselated" near the entry... in other words it has cracked up into small 1" squares .. but still holding to the matting on the back of the lino. Too good to tear up.. but a bit shabby to look at...an hour or so saw it as good as its going to be..
Image
Finished off the day putting the hinges back on the hatch which by now had dried out nicely..
Image
Just have to fit the pull down handles and refit it to the van tomorrow. Then will need to get the engineers from the shed of invention in to look at a secure way of holding the hatch shut when travelling.
Cheers
Reddo
reddo
Posts: 1126
Joined: Fri Jan 30, 2009 1:09 pm
Location: Lake Macquarie

Re: The life and times of "Matilda" The 1956 Bondwood Fairwa

Post by reddo »

Thursday 11th September.... 9/11 in American speak...
Hmmm....
do I attempt anything on the van or I just stay out of harms way??
:?: :roll:
So.. off I go down to the van. Throw the new hatch up onto the roof..Back mounting screws miss old holes by 10mm ?? wouldn't be me without a stuff up.

New holes drilled and hatch fitted. all knee joints on hatch fold down correctly..
Now for the phone call to the shed of Invention.
Yep.. the boys have worked overnight on the drawing board and have come up with a lock down solution!!
So .. off I go with instructions in hand.
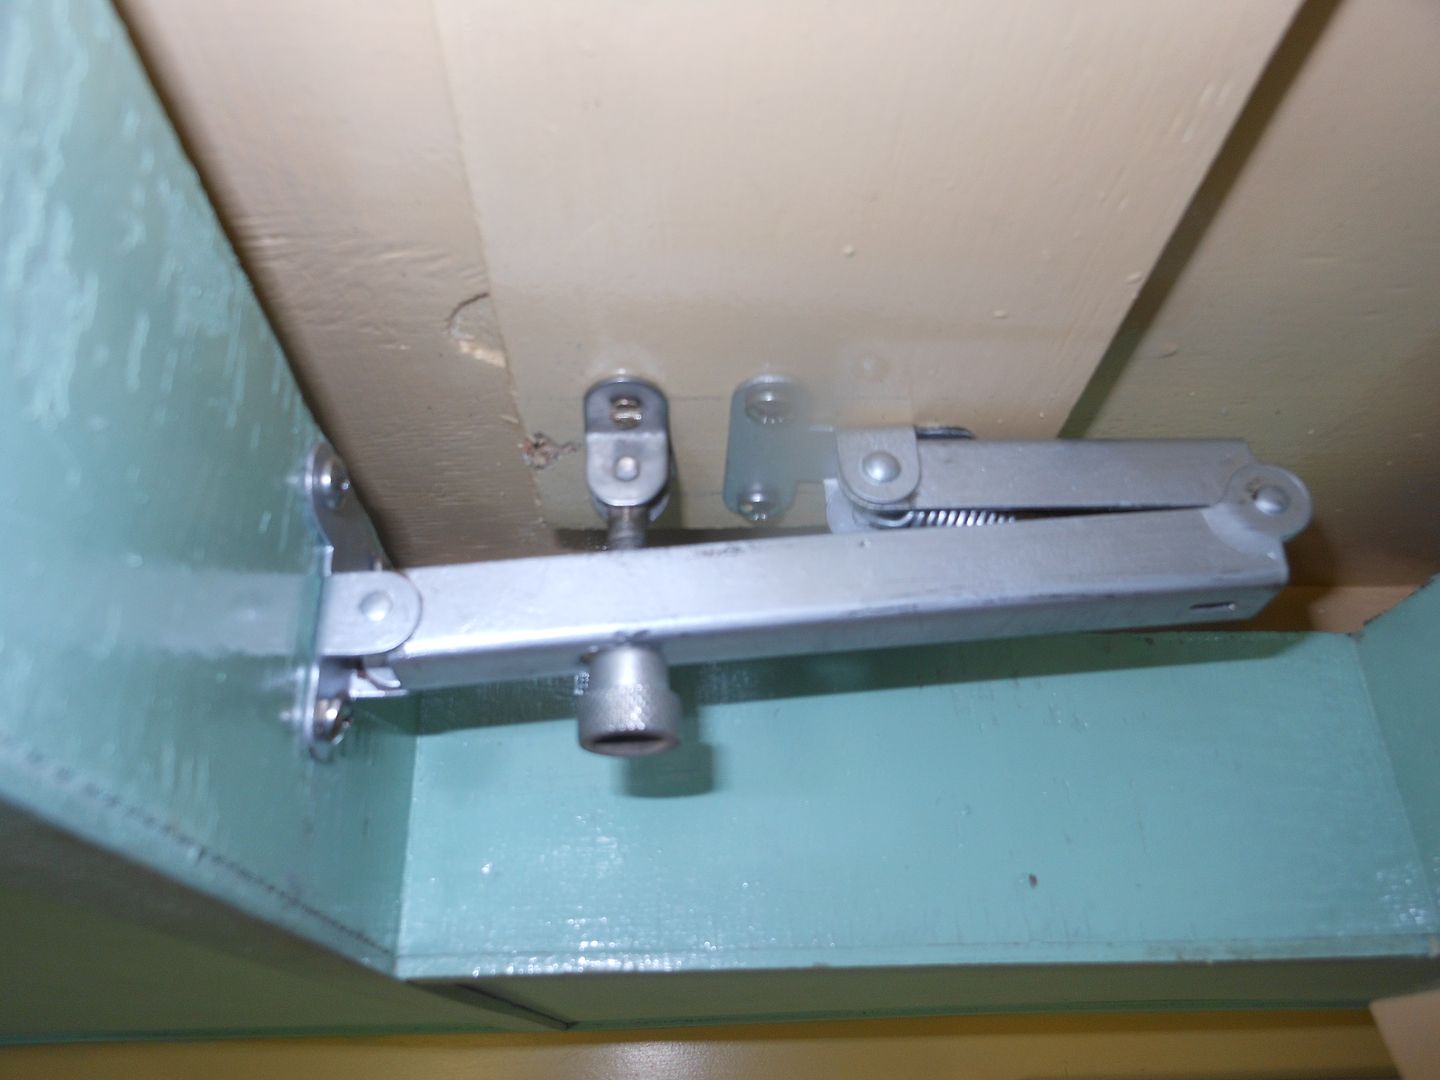
Materials: 2 old "70s style" window locking mechs.
4 X wood screws ( stainless cross heads optional) :P

Tools.: Cordless drill with 6mm bit.

Method:
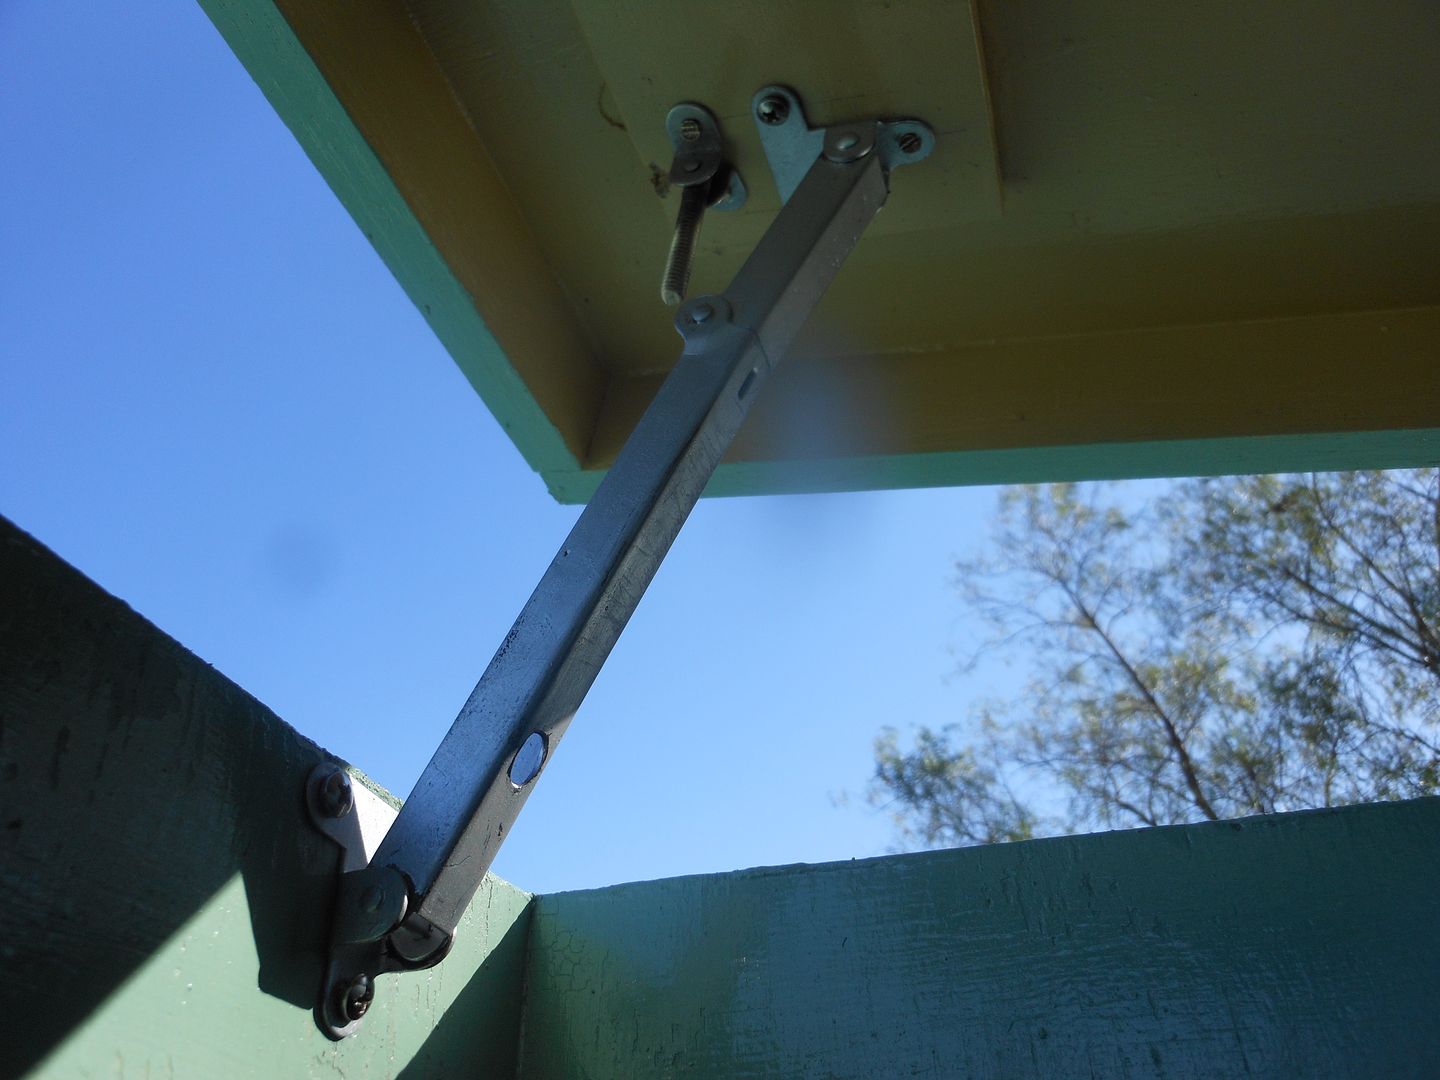
Drill 6mm hole in longer arm of roof support bracket
Mount floppy bracket on hatch with threaded 1/4" rod hanging down directly above hole
See diagram... by Gingos these engineers are thorough
Image
Close hinge down ensuring rod passes through hole.
Attach knurled knob.
Tighten with light pressure.
Repeat steps 1 to 4 on opposite side bracket.
Your done..!!!!
Image
Rejoice ... Drink Beer... 8-)

Spent the rest of the day trying to brush / sand the paint off of the brass flyscreen mesh... with varying success. Dull brass came up to a dull shine?? is that a possibility?? Brass with paint overspray didn't come up real shiney.. can still see overspray..
Solution...
Ask our touring past crew where do I buy new brass gauze flyscreen..?? The big Green shed sells aluminium and fobbergross gauze but no brass....
Wouldn't mind betting it will be expensive if and when I do find it.

Have thought about removing all the screens and the screen door and using a mild acid solution on the existing stuff .

Any ideas??
Reddo
Richard
Posts: 2450
Joined: Wed Nov 26, 2008 4:01 pm
Contact:

Re: The life and times of "Matilda" The 1956 Bondwood Fairwa

Post by Richard »

Hey Reddo.
Great idea for the hold down bolts. A very nice and simple way to tackle a very important part of the hatch, if you dont want it blowing off that is. :roll: :roll:
If you go back to the big green shed you should be able to find bronze fly wire, the only thing is you may need a truck load of fathers day gift cards to pay for it.
Cheers.
ourtouringpast.com THE vintage caravan restoration website
and home of The National Caravan Museum.
reddo
Posts: 1126
Joined: Fri Jan 30, 2009 1:09 pm
Location: Lake Macquarie

Re: The life and times of "Matilda" The 1956 Bondwood Fairwa

Post by reddo »

Hi

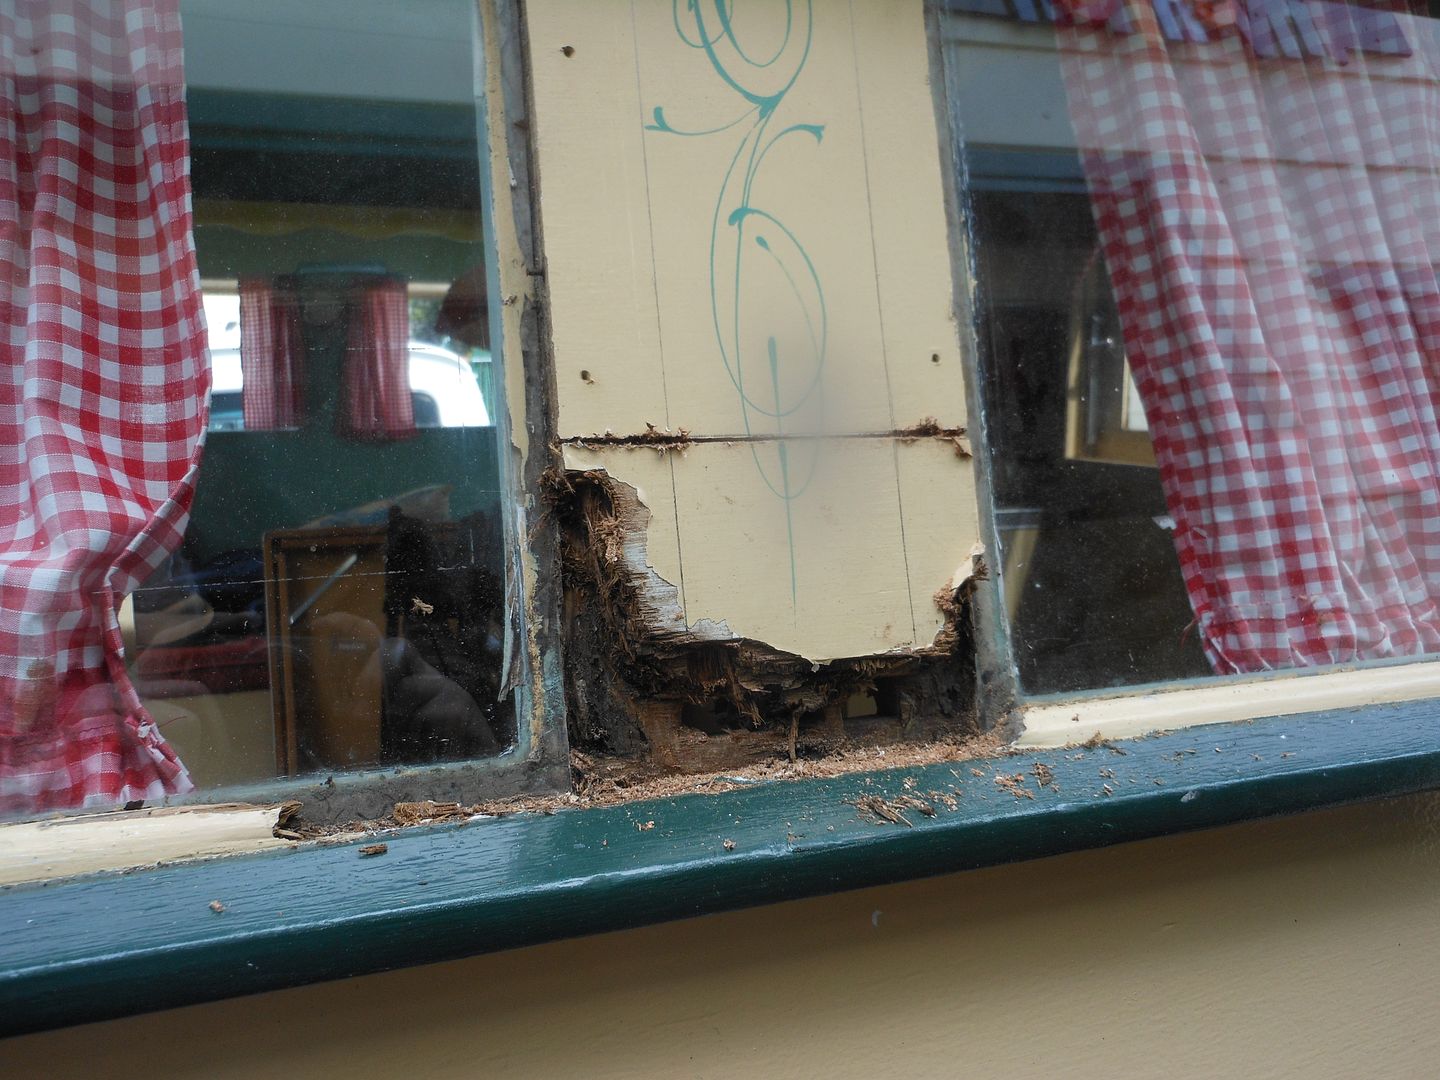
I spent Saturday demolishing the plywood between the back windows of the van.
It had rotted from the bottom of the divider up the timber for approx. 50mm.. the hole area was like a soggy beer carton. had to rip off the quads holding the back windows in to get the divider out.
Took up most of the day but ended up with a tidy repair and good solid timer back in place.
Photos of "before and after" later on.

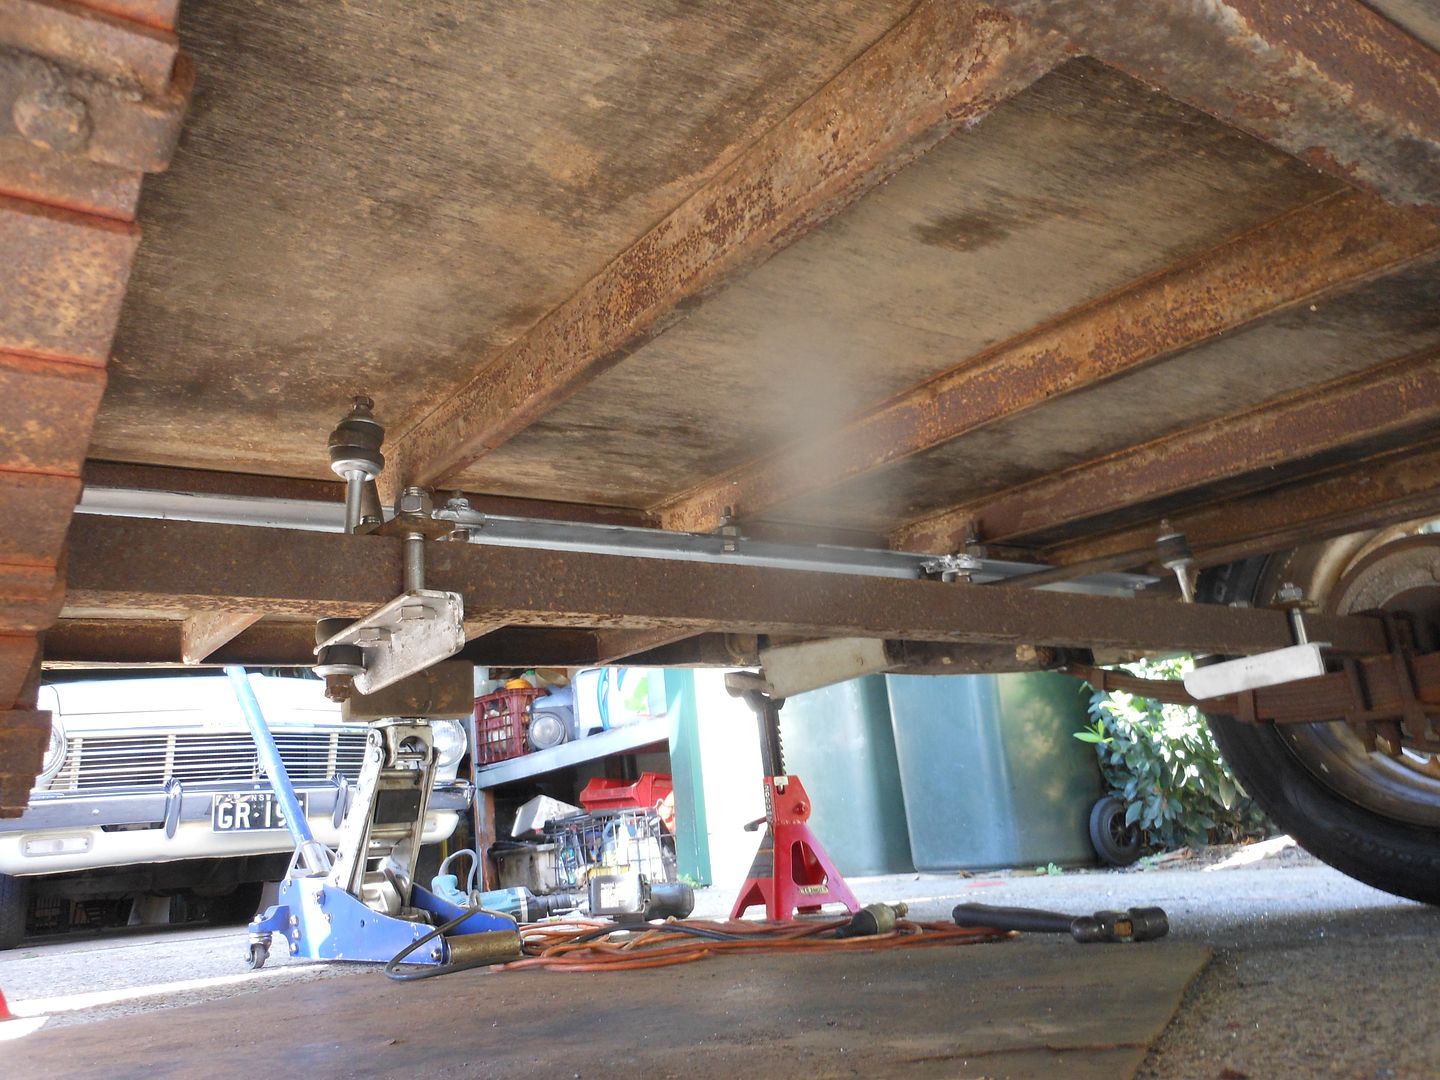
Went over to "One steel " today and bought a piece of 50 x 50 x 5mm angle iron. Have started making a rear swaybar set up . Even though she has an 8 leaf spring stack she sways around a bit when towing.
I don't remember it being too bad back when I owned her in 2006 .. but at that time I was only just getting started in Vintage vanning and just thought ... that is the way they handle...
Over the years I have towed a lot of different vans and they all behave differently .
The Supalite was one of the better vans to tow.

So.. armed with a bit more knowledge than I had back in 2006 I have fiddled with the storage of gear in the van to improve towball weight. Fitted new tyres and adjusted the pressure.....
Now I have moved on to trying something I have always thought would improve an old vans stability...

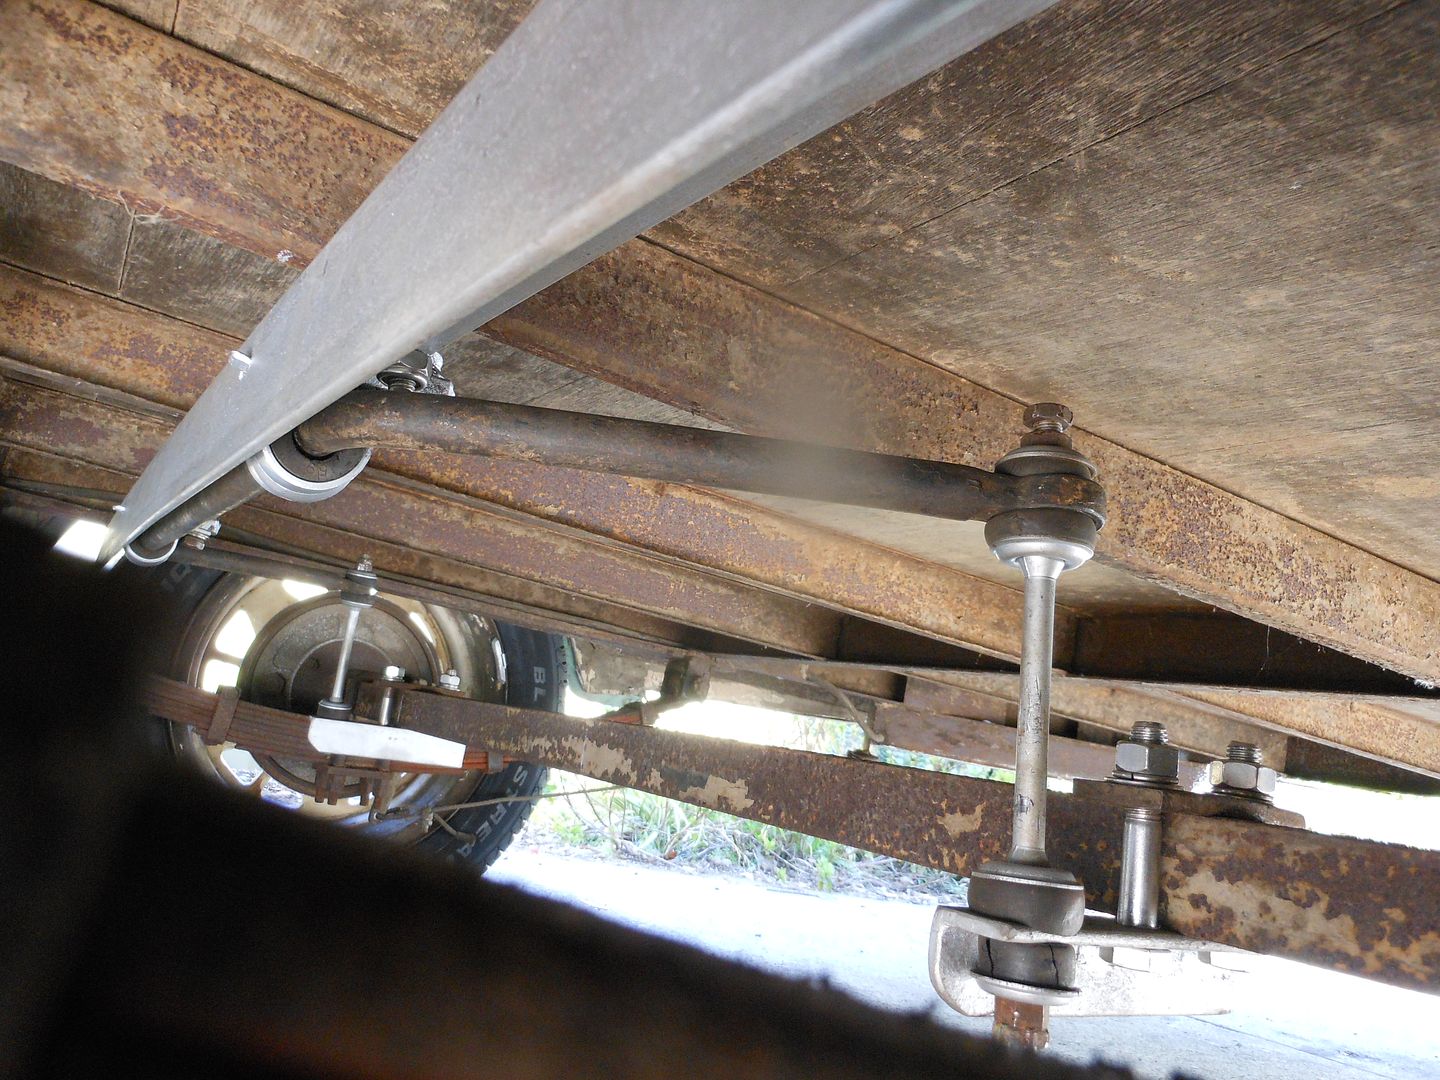
Basically using a swaybar off an EH Holden mounting it on the 50 x 50 and bolting it across the van in front of the axle on the chassis rails. letting the arms of the swaybar face backwards . Clamping brackets on the axle and using the Holden swaybar rods and rubbers between the axle clamp/brackets and the eyes on the swaybar arms.
Sounds all straight forward... but.. I am bound to stuff up somewhere along the way.
Maybe the arms should face forward like they would if you where setting the same thing up under the rear end of a car???

Dunno.. but I am about to find out....??.. Whats your thoughts Col??. I know you mentioned that you had done the same thing under one of your vans using a ford customline bar.
Pivot point forward allowing the arms to move through a "5 o'clock to 1 o'clock" arc . or pivot point aft of axle so moving in a "7 to 11" arc when under load??
I needsta know... hmmm .. perhaps I should ask a fitter :roll: .. they strike me as an intelligent lot... They have told me they are far superior to Electricians ;)
Reddo...
Strugglebrook
Posts: 343
Joined: Tue Jul 15, 2014 9:53 am

Re: The life and times of "Matilda" The 1956 Bondwood Fairwa

Post by Strugglebrook »

Come on Gotsta see the pics :D :D
DC3TD
Posts: 196
Joined: Tue Feb 17, 2009 8:26 pm

Re: The life and times of "Matilda" The 1956 Bondwood Fairwa

Post by DC3TD »

You get used to Reddo hanging you out to dry SBrook.Par for the cause of us wondering how the cogs turn & then voila! pretty pics as usual. gordon
reddo
Posts: 1126
Joined: Fri Jan 30, 2009 1:09 pm
Location: Lake Macquarie

Re: The life and times of "Matilda" The 1956 Bondwood Fairwa

Post by reddo »

Ok Ok..
Keep ya shirt on.... Bloody pusbucket takes for ever to upload happy ( and unhappy snaps)
Firstly.... The rot between the back windows.....
Not a big area to repair.. just fiddly...
Image
God damn that's yucky aye...
This is why ya need to store these old darlings in out of the weather... Sure they can handle weeks / months out on the road . But I am a great believer of the theory that things deteriorate while they are sitting doing nothing.
Also... one of my biggest issues with old plywood van builders is the fact that all the vans I have ever had to work on have no primer of undercoat on the inside of the timber.. cavitys, The backs of the bondwood cladding , timber frames etc.. all due to the fact that they where built down to a price to be competitive in the New van market back in the early days of caravanning in Australia.

Its Ok to say that they used good primers and sealers at the external joins...but.. it doesn't take much to create a leak to the inner surfaces.. Especially with body flexing etc while travelling and expansion and contraction.
Anyway... managed to dig the divider out....
Image
and fit a new section in after buttering it twice with primer sealer undercoat on all surfaces inside and out.
Gave it a couple of thick coast of Dulux 'Birdseed" part of the Reddotel fleet colour range.
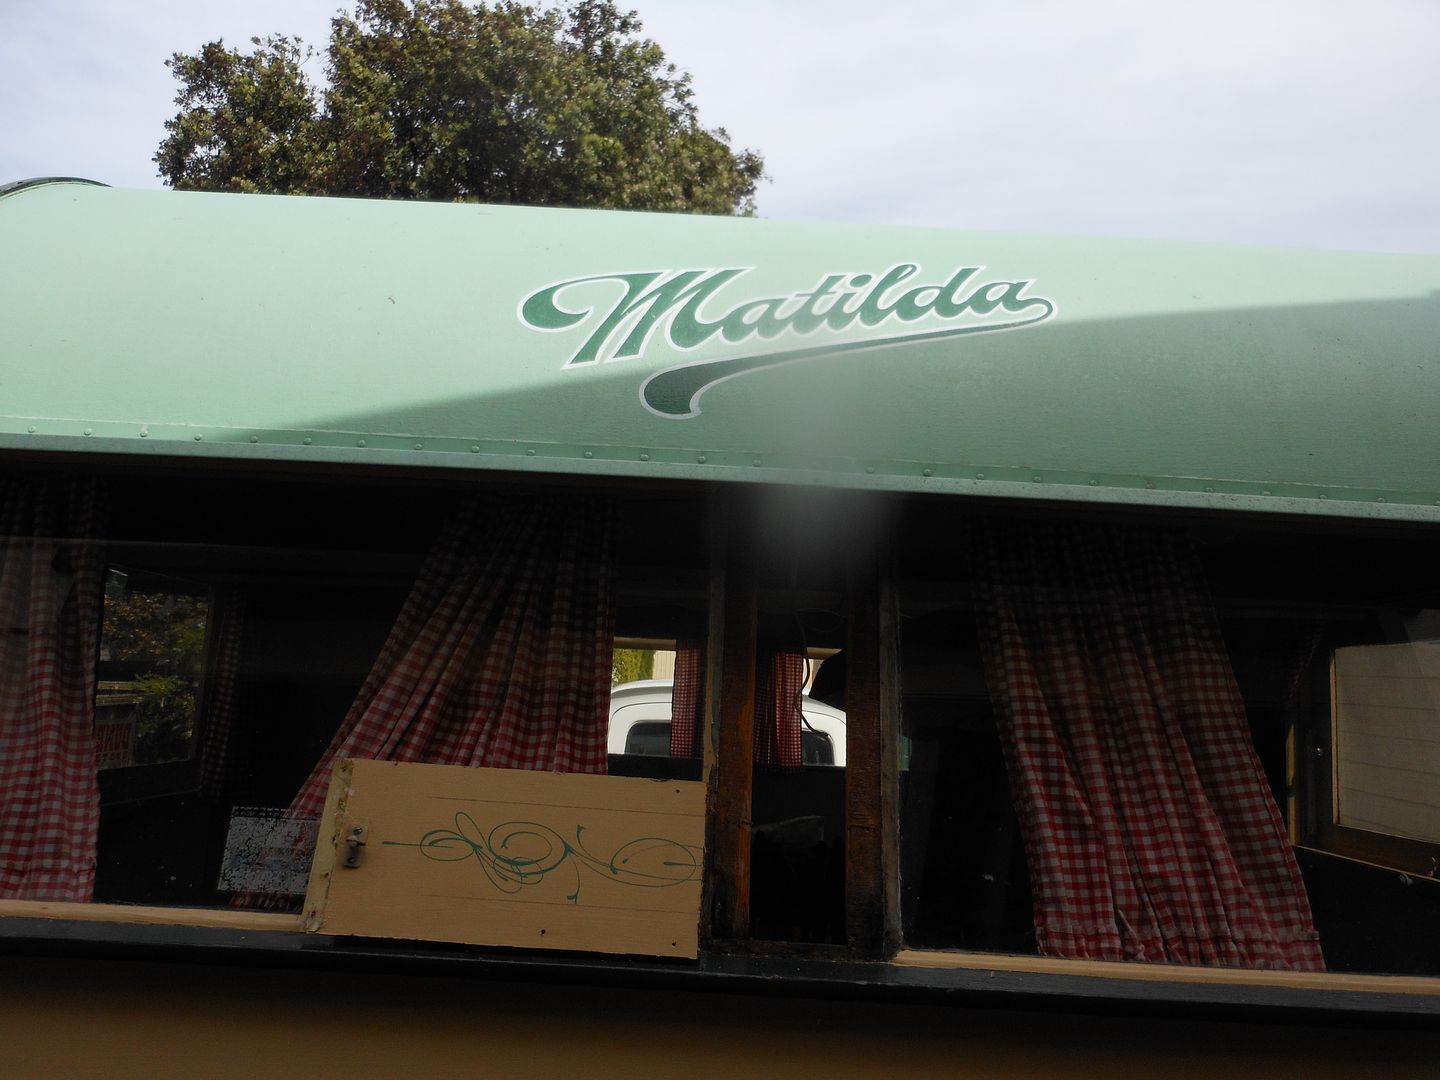
Sorry ... haven't got a pic of it finished... but was tempted to "fiddle " with the timber and create a ventilation door in the pillar .

Ok ..
Now for the swaybar..
A day crawling in and out from under the van and the Reddotel " No more Waltzing( or swaying ) Matilta bar" was done.....
Image
Okasy Ok.. before the fitters jump down my throat.. I did notice the backing nut is not tightened down on the top of the close side connecting rod... its is there to test if the astute fitter would pick it up :lol:
And ... yeeeeeesss .. the clamps on the axle would have probably been better with a 4 bolt instead of a 2 bolt set up.. if it shows tendencies to twist or move about I will develop a MK11 axle clamp
And yessssssss. .. it may have been easier to mount the bar down on the axle with the arms mounted facing up to the chassis... but it is what it is.
Image
Did ya notice the 8 leaf spring stack......
The way if figure it is that a lot of thin leaves give a soft ride. You could have half that many springs but thicker and have a harsh ride... yep.. yep... I know we don't ride in the vans when travelling.. well ... maybe the occasional mother in law might get a ride from Sydney to Brisbane without noticing her missing from the car 8-) :lol:
But... A soft ride also protects the body of the van from jarring and jolts which can rattle a van body to pieces.. especially on the roads that they where dragged along in the 40s 50s and 60s...

Anywho.. with a bit of astute packing , maybe the addition of my old load levelers ( sway bars// there I have said it :roll: )and the reddotel swaybar anti Matildawaltzerbar.. things might be happier next time I tow.

Have just removed Marconni track and dropped annexe off at Charlestown Canvas to get converted to a sailtrack rope setup. Ya should have seen old mates face when he spotted all them Marconni clips.. He has every other sort except the one I have with the d sticking up through the annexe roof and a strip of leather pulled through the d and sewn down on either side of the d.
Almost begged me to let him have em. almost tempeted to give em to him for the cost of the sailtrack rope conversion... $80... but bit my tongue and said " I have counted each and every one of em and I will collect them when I call back for the finished job"
Sorta buggered his day ;) :lol:

Have bought a bit of electrical upgrade stuff to retro fit into the van.
another day.. another headache

Reddo
Col
Posts: 64
Joined: Sat Feb 28, 2009 7:27 pm

Re: The life and times of "Matilda" The 1956 Bondwood Fairwa

Post by Col »

Hiya Red-dude, sorry to bring this up...but...will those swaybar links poke a hole in the floor when the springs are compressed?. When I put the bar on ours,I mounted the bar itself on the axle...that way it just goes up and down with the axle and the swaybar links are mounted to a crossbeam like yours ,so they never move in relation to the floor......sort of arse about to how yours is set up....
reddo
Posts: 1126
Joined: Fri Jan 30, 2009 1:09 pm
Location: Lake Macquarie

Re: The life and times of "Matilda" The 1956 Bondwood Fairwa

Post by reddo »

Hi Col
Thanks for your input.. and yes .. most rear sway bars are mounted on the diff housing rather that the body . Reason being ?? I suppose the diff housing is stronger or better handles the torque from the engine and less likely to distort???

It looks like the heads of those rods are close to the floor . camera angle. There is actually about 75mm clearance from the floor.
I don't think the axle movement will be great enough to cause a problem...especially if I am trying to reduce weight of gear stored in the van aft of the axle. However.. rather than court problems I am thinking of making up some 40mm shorter rods out of running thread. Use nyloc nuts above and below the standard Holden rubbers and cup washers .

I mounted everything up that way as I didn't have saddles that would fit neatly over the sway bar and clamp to the 40mm square axle... I did have an endless supply of Holden front bar saddles ..

Cheers mate
Reddo
reddo
Posts: 1126
Joined: Fri Jan 30, 2009 1:09 pm
Location: Lake Macquarie

Re: The life and times of "Matilda" The 1956 Bondwood Fairwa

Post by reddo »

Hi All...
Well the decision had to be made... Do I stay with the Marconni track and continue with the traditional cursing and swearing every time I put the annexe up... or... do I convert to sail track ??

Good I am glad you all agree with the second choice. :D

So yesterday was sail track installation day.

I have tackled this job before and learnt a few tricks along the way... Thought I would list a few facts and handy hints that might help anyone considering installing a track on there van..
1. Remove old track
2. clean all old paint, silastic and remove any old screws that might be holding the "L" mould on in the area where the new track has to be mounted. If the roof mould lifts when you remove the screws ..( It shouldn't , but if it does) give the area under the mould a clean out with a paint scraper or similar to remove old sealant and run a bead of new sealant .Leave it sit while you prepare the new track for mounting.. just make sure you get the new track installed and tightened down in the next few hours
3.Silastic ( or similar ) all the holes that are exposed along the proposed mounting area. This will stop moisture getting down in the holes and rotting your timber.
4.Good opportunity to get in and polish the track at this stage if you wish to do so.
5. If using your old annexe with new sail track rope installed . measure the length of the annexe and cut sail track to that length. or... it may be necessary to shorten the track so that the rope is easy to pull around a shortened radius... or The new track may need to be the same length as the old Marconni track.. it will be close to what is needed... each van is different and it will pay to have a good look at this before you cut anything.
6. Make sure you file any sharp edges left from cutting the track. File a lead in "throat"( Vee) in the ends of the track so that the track accepts the annexe rope easily when erecting.
7. Mark out and centre punch the screw hole positions in the track. I put the holes at 150mm centres around the tight radius at either end of the track and 300mm apart along the roof /straight areas/
8. Drill 3mm holes in track and file off any burrs on the underside of the track
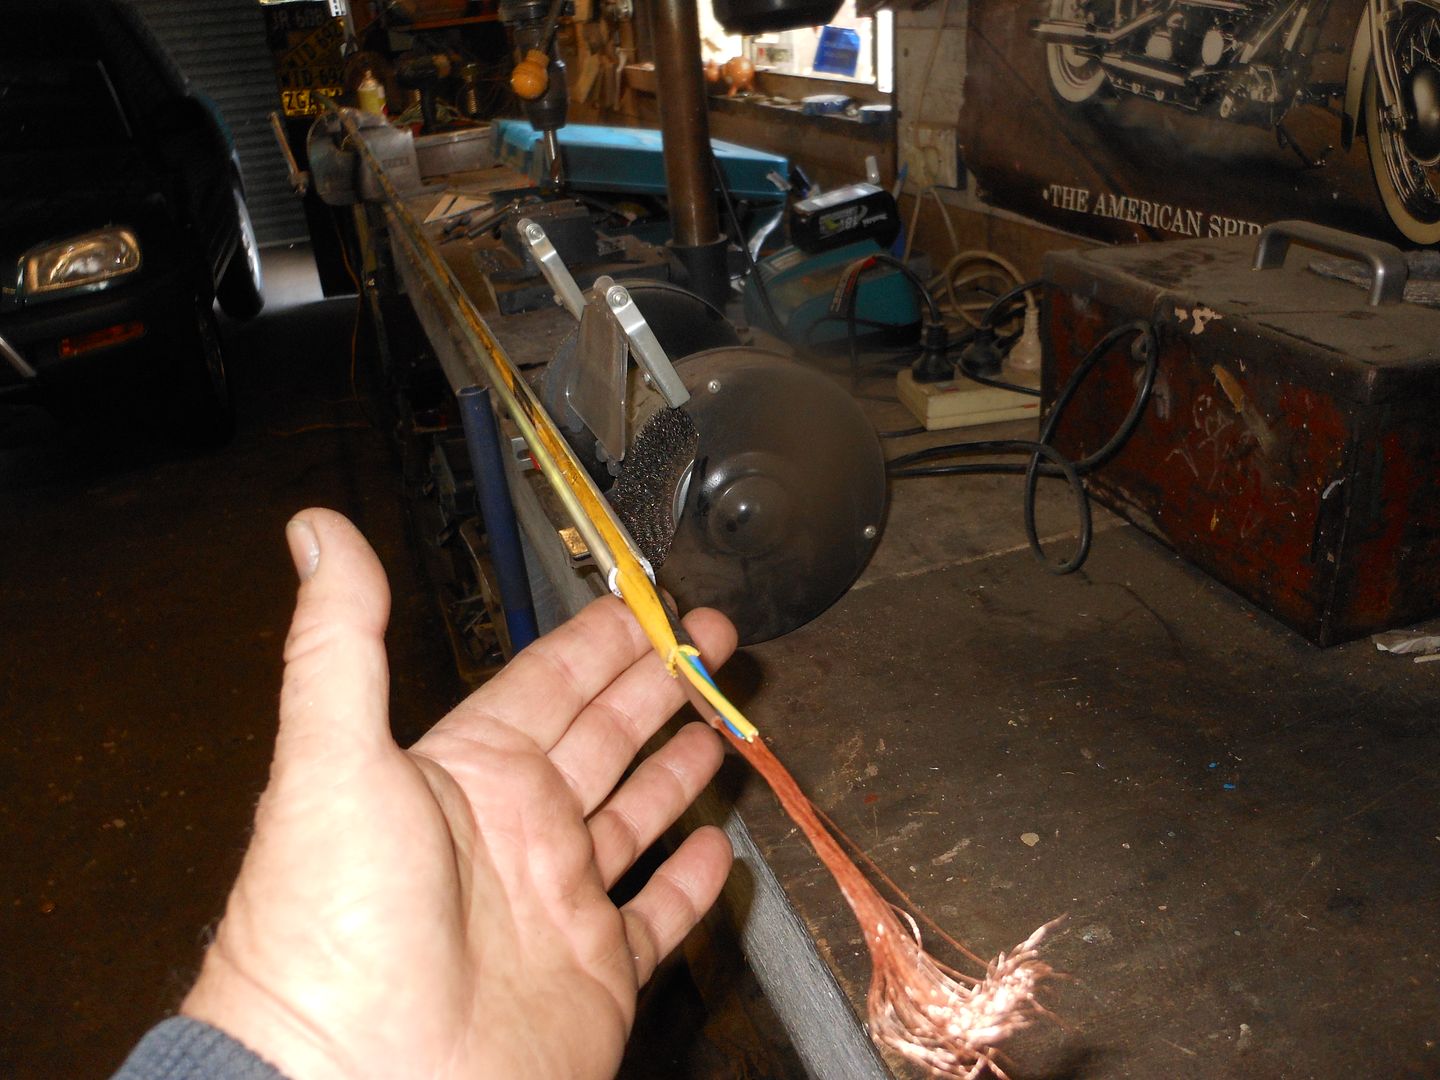
9. Find a piece of rope or similar ( I used an old length of 3 core extension lead) .. spray the track groove with a lubricant and push the rope/lead along the track for its entire length..
I had to tie a draw wire to the cable. It was a very neat fit ( Good 8-) ).
Image
The rope will keep the groove in a round shape when you bend the track.. no distortion . :idea:
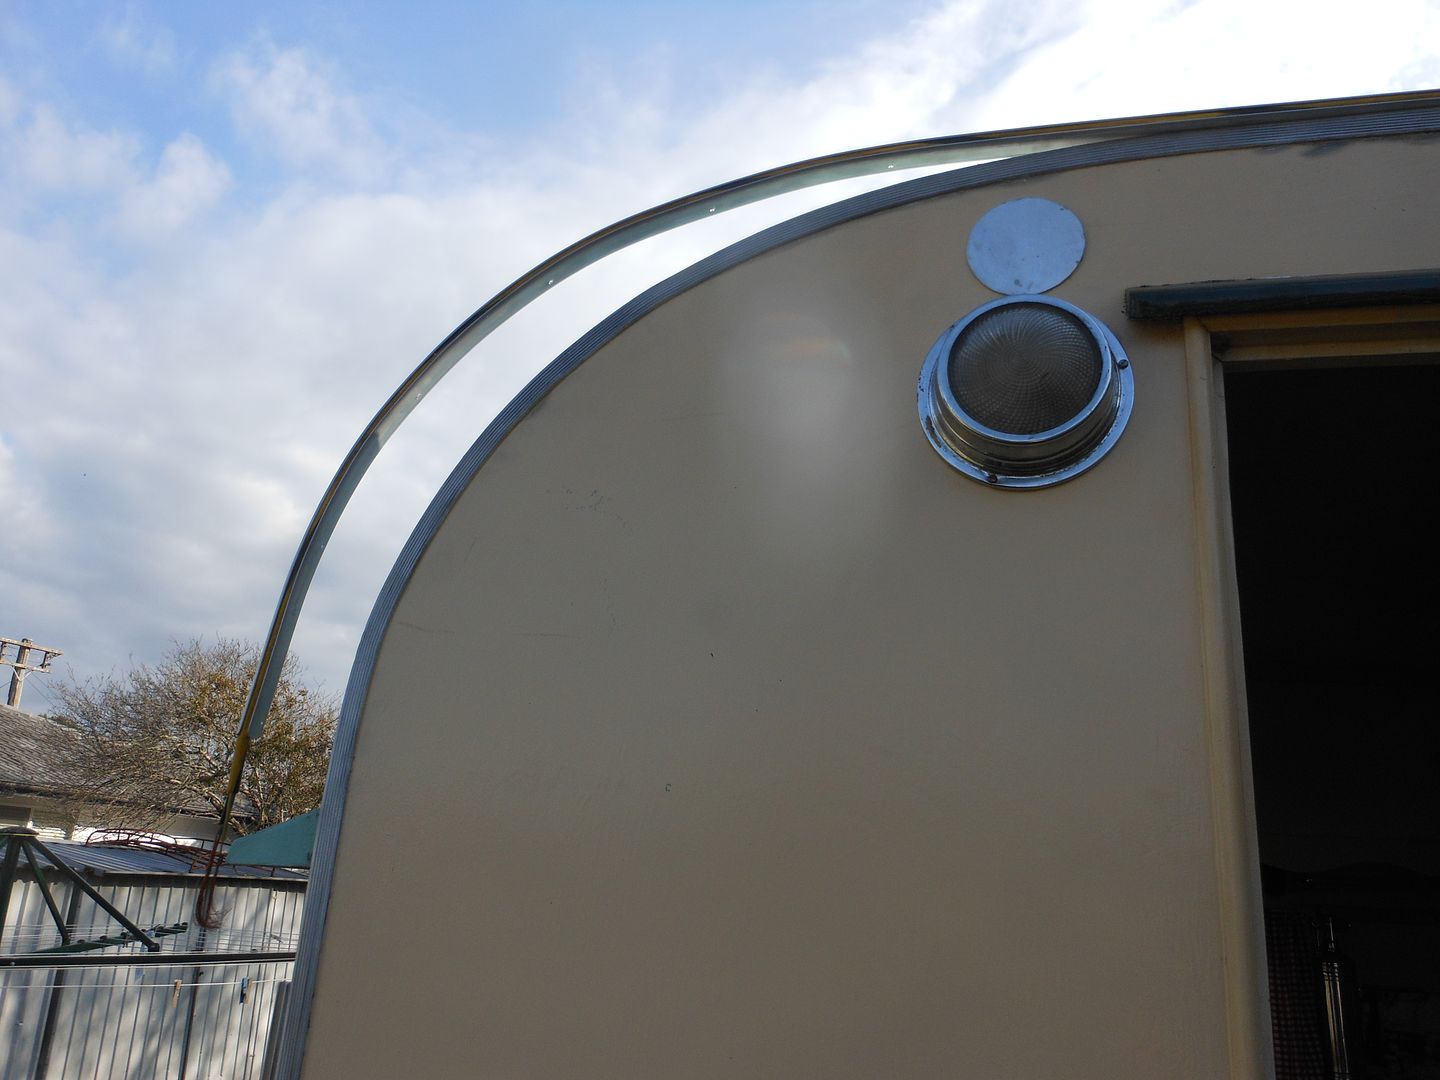
10. Your now ready to bung the mould up on the van and bend it to shape. Its better to make a lot of small bends with your hands close together and gradually work the radius to suit your van checking regularly that you are getting it close to the desired shape , rather than grab the track with hands a metre apart and try and wrap it over the van.. The track weighed a fair bit with extension lead through it so I laid the length on the roof and worked my way around the radius down to the point where I wanted the start of the track to sit.
Image
11. Once your happy with the bend . check that there isn't anything along its intended mount point that will stop it from sitting back on the roof . In Matildas case the little awning ends where close .
If anything is in the way you will need to cut/file a section out of the track flat section so it will allow the track to sit back even so the track can be mounted straight...
12.Fix track to roof with Brass or stainless screws ..I used staino 3/4" X 6g. don't use zinc screws , they will rust within 12 months. :( .. With a bit of luck your new screw holes wont line up with the old holes and you will get the track screwed down nice and tight along its entire length.
13. Keep checking that the track is sitting back in a straight line along the roof as you aline and drill each screw hole. Make sure you clean any shavings / swarf from under the track before tightening down. Also keep checking that you can still pull the rope/ cable along the track a little in either direction as you work your way towards the back of the van.
:!: There is no advantage in using a sealant between the roof mould and the track. If it is tightened down hard there shouldn't be any gaps .Also.. if the annexe has been made properly there should be a "Flap " section that extends onto the roof of the van to cover the entire sailtrack and a small section of the roof of your van to weatherproof the annexe to roof area..
The main area to check is the roof mould to roof ( See No:2). if it has lifted when you removed the old track it may be necessary to run a bead of sealant along its edge to prevent water that is laying on the roof of the van from getting under the mould and into the woodwork in the ceiling or wall cavity.
14. Bend mould to suit the rear curve of the van and work ypour way around the curve installing screws. keep a bit of tension / weight on the end of the track so that the screws haven't got tension on them as you are tightening them down. If the track isn't pulled down by hand you risk stripping the timber in the drilled holes while tensioning them down. Remember .. you don't know how good/bad the timber you are fixing into is..
15. If you have measure things correctly the track should finish just where you intended it to.
If it doesnt :cry: .. ( mine was about by 25mm :roll: :? :oops: ). Slide the rope/ cable out of the track. Undo the last 2 or 3 screws and ease the track Mark correct length .. slide a piece of timber in behind the track to support it while cutting and cut track to correct length. ( file V in end of track and remove sharp edges again :roll: :cry: Hey .. I am only human.. I am suppose to make mistakes .. and... be happy to admit to doing them)) .

16. Stand back and check out your handiwork .. rejoice.. drink beer 8-) ..( even if you have stuffed up and there is no cause to rejoice :lol: )
Obviuosly there will be plenty that don't see this as the best way to install a track and have other ideas.... but hey .. it works for me and the info above is just a guide... no gospel. ;)

Reddo
Post Reply